Chocolate Hazelnut Mousse with Cinnamon Whipped Cream
March 25, 2010 at 6:36 pm (Dessert, Recipes, Techniques)
Tags: chocolate, cinnamon whipped cream, Dessert, easy recipe, hazelnut, mixer, mousse, Nutella, quick dessert recipe, recipe, vanilla

Hold onto your hats, boys and girls. What follows could very well change your life. OK, that may be overstating things a bit, but you really won’t believe how delicious this recipe is. With this in your repertoire, you will have a new recipe to impress your friends and family. And best of all — it’s almost embarrassingly simple.
Thanks to The Wicked Noodle for the inspiration for this recipe.
Ingredients:
- 1 ½ pints (3 cups) heavy whipping cream
- ½ cup sugar
- 1 teaspoon cinnamon
- ½ teaspoon vanilla
- 1 cup chocolate hazelnut spread*
Directions:
- In bowl of electric mixer, beat 1 cup cream, sugar, cinnamon, and vanilla until soft to medium peaks form, approximately 2 to 3 minutes. Do not overbeat (unless you fancy cinnamon butter).
- Scrape whipped cream into a lidded container. Cover and refrigerate.
- In same mixing bowl (no need to wash), beat chocolate hazelnut spread and remaining 2 cups whipping cream to soft peaks, again about 2 to 3 minutes.
- Scrape mousse into a lidded container. Cover and refrigerate for 3 to 4 hours.
- Serve mousse topped with cinnamon whipped cream in individual serving dishes.
Yields 6 servings.
* Nutella is the best-known brand of chocolate hazelnut spread, but there are others. For example, Cost Plus World Market has its own brand, which is every bit as good as Nutella, and quite a bit cheaper.


Cocoa Banana Muffins {ModBak}
March 14, 2010 at 7:51 pm (Modern Baker Challenge, Muffins, Quick Bread)
Tags: banana, Dutch process cocoa, modbak challenge, Modern Baker, muffns, quick bread

The Modern Baker Challenge will be kicking off in a few weeks. I’m very excited about this challenge for several reasons. I have quite a sweet tooth, so a challenge including cakes, pies, and torts seems right up my alley. And speaking of pies, I’ve never been much of a pie maker, and I’m hoping this challenge will change that.
But the thing I’m most excited about is that I asked my 12-year-old to bake along with me, and she said yes! I love baking with my kids, and the thought of making 150 recipes over about two years with her thrills me to no end. I’m hoping that, in addition to us both developing some mad baking skills, I’m able to impart a few things to her, most especially the importance of using mise en place and of cleaning up as you go. Tall order, I know. But as I said, I have two years to accomplish it.
We are both so excited about the challenge that we started baking out of The Modern Baker about a week ago. So far, we have made Fennel Fig & Almond Bread (the first recipe in the book) and the subject of this entry, Cocoa Banana Muffins.
We started the muffins with our mise en place.

Although the recipe calls for quite a few ingredients, they are mostly things you probably already have on hand. The only thing I had to buy was Dutch process cocoa powder, not because I don’t normally keep it but because I was out. That and a few overripe bananas, and we were good to go.
While Molly mixed the batter, Abby and I prepared the muffin pan. The recipe makes 16 muffins, so we used our 12- and 6-cavity muffin tins. If you only have two 12-cavity tins, remember to fill the unused tins about half full with water to keep them from scorching.

We baked the muffins in a 350 dF oven for 30 minutes, until the cake tester came out with just a few moist crumbs.
The house smelled amazing, and the muffins looked great. We waited until they cooled, then began devouring them.

The dark cocoa made a huge difference in both the appearance and taste of these muffins. They were very moist and tasted more like cupcakes than muffins. Perfect with a cup of coffee or tea, these muffins would make a great addition to a weekend brunch with friends.
The Bread Baker’s Apprentice — The Challenge Takes Its Toll
March 12, 2010 at 12:00 pm (BBA Challenge)
Tags: BBA Challenge, Bread Baker's Apprentice, Modern Baker
Although I had been baking from The Bread Baker’s Apprentice for about a year before beginning the BBA Challenge, my book was still in pretty good shape. In fact, about three months into the Challenge, the book still looked OK, as can be seen in this photo.

By the end of the Challenge, it was a different story. Here’s how the book looks now.


It’s sort of the Velveteen Rabbit of cookbooks. Well worn. Well-used. Well loved.
I wonder what The Modern Baker will look like when I finish baking my way through it.
Roasted Onion and Asiago Miche — BBA, The Final Chapter
March 11, 2010 at 8:55 pm (BBA Challenge, Bread Baker's Apprentice, Bread Baking, Peter Reinhart, Preferment, Sourdough, Starters)
Tags: Asiago, BBA Challenge, Bread Baker's Apprentice, fermenting, Miche, Modern Baker, Nick Malgieri, Peter Reinhart, proofing dough, Roasted onion, soaker, sourdough starter, sponge
The final bread in the BBA Challenge is a whopper. In fact, if you make the whole recipe, you’ll end up with almost 6 pounds of dough. Which is why I made a half recipe, which still made one huge miche.

This is a 3-day bread. On the first day, I fed Edwina (my second sourdough starter) and made a sponge. I also roasted the onion in the oven.

When you start weighing your onions, you may have been baking too much

The onions smelled so good roasting, I wasn’t sure I could wait 2 days to eat them. Once they cooled, I put them in the refrigerator. My sponge was developing slowly, so I left it out on the counter overnight.
The next day, I mixed the dough, which consisted of flour, yeast, water, salt, the sponge, olive oil, chives, cheese, and scallions. The half-recipe calls for 8 ounces of Asiago cheese, half of which goes into the dough. I used a mix of 4 different cheeses: Asiago, Parmesan, Pecorino Romano, and Parmesano Reggiano. Between the cheeses, chives, and other ingredients, this was easily the most expensive bread in the BBA Challenge. I think I sunk over $20 in ingredients into this dough.
By cutting the recipe in half, I was able to mix it in my Kitchen Aid. It still made a lot of dough.

The dough fermented for about 3 hours, until it had doubled in size.

I formed the loaf into a miche, placed it on a sheet pan, then put it in the fridge overnight.

The next day, I took the dough out of the refrigerator and let it rest for about 2 hours. This allowed the dough to come close to room temperature and to rise a bit more. At the end of the proofing period, I brushed the dough with olive oil and dimpled it with my fingers, then sprinkled on the rest of the cheese and the roasted onions.

I baked the loaves with steam in a reducing oven until the internal temperature reached 195 dF. The onions roasted a bit too dark for my taste. The next time I make this bread, I’ll cover it with foil after about 10 to 15 minutes of baking.

This bread was delicious. The cheese and onions gave it a distinct flavor. This was not a timid bread, content to play second fiddle to a main dish. This is a bread that craves, no demands, the spotlight. It would be good with vegetable soup or another sidekick kind of dish. But it really shines on its own.
My wife pronounced it one of her favorite BBA breads. I would have to agree.
Life after the BBA Challenge
The question on a lot of minds is, so, now what? Paul at Yumarama is forming a Mellow Bakers Group; one in which people will bake together at a relaxed pace. First up is Hot Cross Buns. Check out Paul’s blog for details.
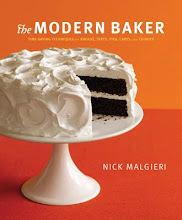
As for me, I’m setting off on another long baking journey. I’ll be working my way through Nick Malgieri’s The Modern Baker, a collection of about 150 recipe covering quick breads, yeast breads, tarts, pies, and cakes.

The Modern Baker Challenge will kick off around the beginning of April. If you’re interested, pick up a copy of Nick’s book, start reading the introductory sections, and check out the ModBak blog for details.