Chicken B’stilla {FFwD}

This week’s pick for French Fridays with Dorie is actually a Moroccan dish that has been adopted — and adapted — by the French to the point that it fits perfectly in a cookbook like Around My French Table. I was excited by both the ingredients and techniques in this recipe. Savory dishes with spices like cinnamon and ginger are always a treat. And I was looking forward to working with phyllo dough, which was a new ingredient for me.

I began by marinating chicken breasts overnight in a mixture of onions, garlic, ginger, coriander, cinnamon, and saffron. I was intrigued by this part of the recipe, as I had never heard of a marinade made of aromatics and dry spices with no liquid. It worked, though, as the chicken came out nicely spiced and beautifully colored by the saffron.

I put the chicken and marinade in a pot with chicken broth and simmered the whole thing to cook the chicken.

I removed the chicken to a bowl to cool, then strained the broth, reserving the vegetables. I put the broth back in the pan, added lemon juice, and cooked it to reduce the broth to about one cup. Then I added eggs that had been whisked with honey, and boiled the whole thing down to a nice sauce.

I added the reserved onions and the chicken, which had been removed from the bone and chunked up, back to the pan, seasoned with salt, pepper, parsley, and cilantro, and stirred it together to make the filling.

Then it was time to assemble the b’stilla ( be-STEE-ah). I brushed a 9-inch cake pan with melted butter, then layered it with buttered sheets of phyllo.

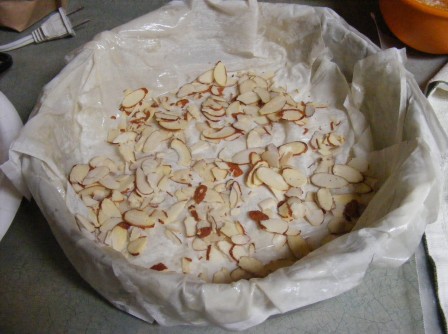
I sprinkled sliced almonds on the phyllo in the pan.

Then I spooned in the filling, sprinkled on more almonds, and folded the phyllo over the top.

To top the b’stilla, I layered sheet of buttered phyllo, then cut them into an 11-inch circle.

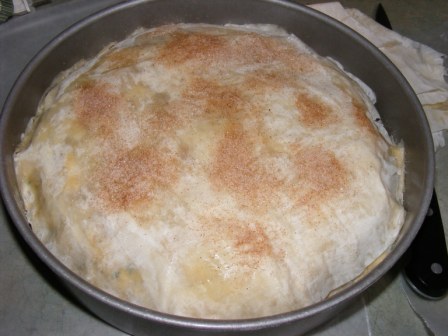
I placed the phyllo on top of the b’stilla, tucked it around the sides, and sprinkled the top with cinnamon-sugar.

I baked the b’stilla in a reducing oven until the top was well-browned and crispy.

To serve, I inverted the b’stilla onto a baking sheet, then quickly turned it right side up onto a serving plate.

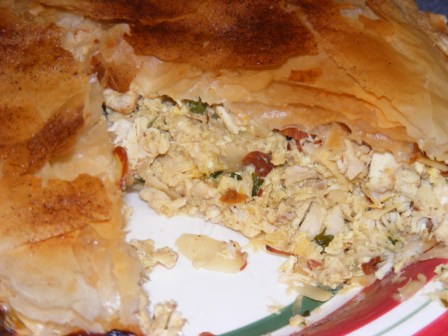
I sliced the b’stilla and served it for a satisfying winter supper.

As Dorie notes in the recipe, this dish needs no accompaniment. It’s a complete, filling, and satisfying meal on its own. We really enjoyed the complex flavors and textures of this dish: from the savory chicken to the slightly sweet spices and light-as-air phyllo crust.

My wife tried it and pronounced it her “new favorite dish.” So you can bet this offering from Dorie’s French table will be making regular appearances on mine.

Tomato & Cantal Tart {ModBak}

The sixth tart recipe in the Savory Tarts & Pies section of the Modern Baker Challenge is the only tart in this section that doesn’t contain any eggs. Rather than a custard, this tart consists mainly of tomatoes and cheese. The recipe calls for Cantal, a French cheese similar to Gruyère. I ended up using Gruyère, as I couldn’t find Cantal at my market.

The recipe is also supposed to be made with fresh tomatoes, which unfortunately can’t be found around here this time of year. Not wanting to wait until summer to make this recipe, I decided to roast some tomatoes in order to make them taste more like fresh, ripe tomatoes.

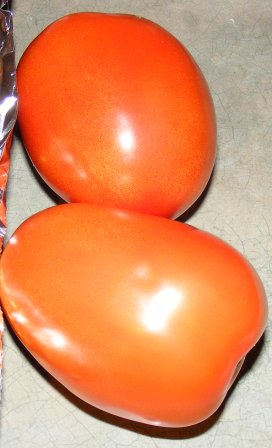
I began with two Roma tomatoes.

I sliced the tomatoes, spread them on a foil-lined baking sheet, and sprinkled them with a little salt and sugar.

I roasted the tomatoes in a 350°F oven for about 35 minutes, until they were slightly shriveled and most of the moisture had evaporated.

It was amazing how much roasting affected the flavor and texture of these tomatoes. They obviously still weren’t as good as vine-ripened summer tomatoes, but they were by far the best tomatoes I’ve had in the middle of a Midwest winter. I allowed the Romas to cool on the baking sheet while I prepared my mise en place for the tart.

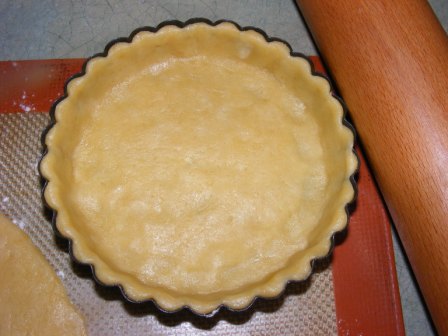
The tart is very simple to assemble. After making the pastry, I spread Dijon mustard in the bottom of the tart shell.

Then I sprinkled on some shredded Gruyère.

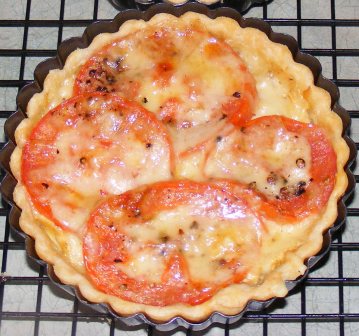
Next, I added tomatoes in an overlapping layer.

I sprinkled some pepper on the tomatoes, then added another layer of cheese.

I baked the tart at 350°F for about 25 minutes, until the cheese was melted and nice and bubbly.

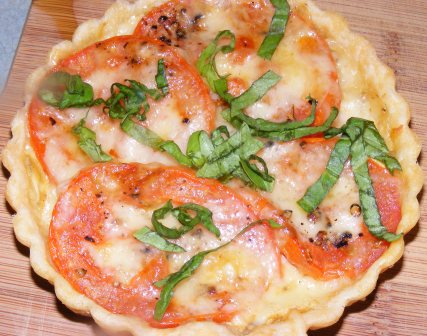
I unmolded the tart while it was still warm, then topped it with basil chiffonade and a drizzle of olive oil.

I baked the tomato & Gruyère tart on the same day that I made the Swiss onion tart. I made each of them as mini tarts, so I decided to serve them side-by-side.

I enjoyed them both, and the tomato tart reminded me of a really good grilled cheese sandwich (I always put tomato slices on my grilled cheese). But I have to say that I missed the custard in the tomato tart, and I thought the onion tart won out in both flavor and complexity.

I will make this tart again, although I’ll probably wait until summer so I can try it with garden fresh tomatoes. I do like the idea of making mini tarts and serving them together. And I might even do four tarts and serve a wedge of each sometime for brunch.

If you’re following along on the Modern Baker Challenge page, you’ll note that I have one more tart to go before I get to the dreaded curried fish pie. Stay tuned. It should be interesting.

Boeuf à la Mode {AMFT} {FFwD}

OK, let’s just get this out of the way right up front. In cooking terms, “à la mode” only means “with ice cream” in the US and Canada. More broadly, “à la mode” refers to beef and vegetables braised in wine. Think about that the next time you’re at Applebee’s and the waitress asks if you want your pie à la mode.

This recipe is from Dorie Greenspan‘s Around My French Table. It’s very similar to the Go-to Beef Daube recipe that I made for French Fridays with Dorie in December. The main difference is that the beef in this recipe is braised whole, instead of being cut up as it is in for daube.

I began by trimming the beef of most of its fat, then marinating it overnight in a mixture of red wine, olive oil, aromatic vegetables, and a bouquet garni of thyme, parsley, rosemary, bay leaf, and celery leaves.

The next day, I removed the meat from the marinade and set it aside to dry a bit.

I strained the marinade, reserving the wine and vegetables.

I boiled the wine mixture until it was reduced by about half, then added beef broth and brought it back to the boil before setting it aside off the heat.

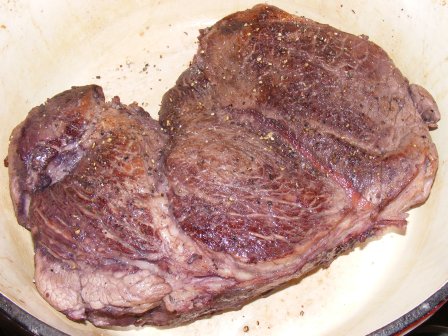
In the meantime, I browned the meat in a small amount of oil. Once it was well-browned on all sides, I salted and peppered it, then placed it in a Dutch oven.

Next, I sautéed the vegetables in oil for a few minutes. I seasoned the vegetables, then added a bit of cognac to deglaze the pan before adding it all to the Dutch oven with the meat.

Finally, I put a bit of the wine-broth mixture into the pan, then added four anchovies and some tomato paste. The anchovies broke down quickly into the mixture and gave the dish a more complex flavor that was not at all fishy. I added this, along with the rest of the wine-broth mixture, to the Dutch oven, covered the pot with foil and the lid, and slid it in the oven.

I braised the beef for an two-and-a-half hours, until the roast was fork tender.

The recipe says to remove and discard the vegetables, but like Dorie’s husband, I was too fond of the mushy carrots to do that. I sliced the beef and served it for dinner with a salad and some fresh bread. It was delicious and reminded us all of our favorite Sunday roast, with a little more flavor and complexity.

Like all good pot roasts, it was even better reheated the next day. I enjoyed it every bit as much as the beef daube (which I loved), and will definitely be making it again.

(By the way, don’t tell my family that it had anchovies in it. No one noticed, and they wouldn’t eat it if they knew. So let’s just keep it our little secret.)

Swiss Onion Tart {ModBak}

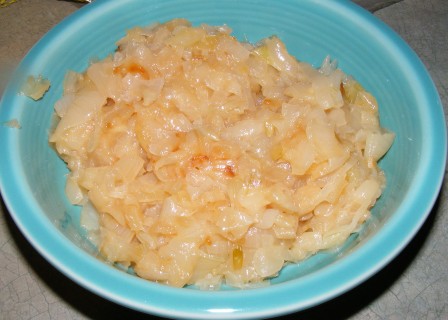
The fourth tart recipe in the Savory Tarts & Pies section of The Modern Baker is a caramelized onion tart. If the idea of onion pie or tart doesn’t appeal to you, it’s only because you’ve never tried Nick’s recipe. The onions are caramelized slowly to draw out and evaporate their water, then cooked in butter until they are soft, golden, and oh so sweet.

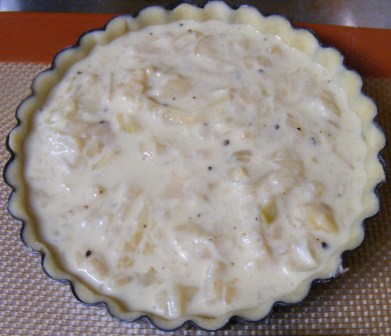
Once the onions are cooked, the recipe comes together really quickly. You mix flour, milk, cream, eggs, salt, pepper, and the caramelized onions in a bowl and pour it into a tart crust.

The whole thing is baked in a 350°F oven for about 30 minutes (less in the case of mini tarts like I made), until the crust is baked through and the filling has set.

You can serve the tart warm or allow it to cool to room temperature. It was delicious both ways. For a light supper, I would serve it warm with a mixed greens salad. But it would also work really well cooled as an appetizer or brunch dish, as it could be made ahead of time and allowed to sit at room temperature until serving time.

Either way, this was a wonderful tart — sweet, savory, not too heavy — that would be great for Saturday brunch or Sunday supper.

Check out the Modern Baker Challenge blog to see Kayte’s bacon-lovers version of this tart and to view blogs on all the recipes in the book that we’ve made so far.

Double Chocolate Mousse Cake {FFwD}

This week’s pick for French Fridays with Dorie seemed like a solid choice. Who doesn’t love chocolate? And baked mousse cake couldn’t be all bad, could it?

I will admit that the recipe seemed a little daunting. Although the ingredients list is short — bittersweet chocolate, espresso/coffee, butter, sugar, salt, and eggs — there are four variations suggested in the recipe. And whichever one you make, there are multiple steps, including mixing, baking, cooling, baking again (or not), more chilling, etc. It wasn’t that any of the instructions seemed particularly difficult. For me it was the fact that all of the options are given throughout the recipe. So rather than following the recipe straight through, you have to jump here or there depending on which variation you’re making. It reminded me of those choose your own adventure books from when I was a kid, but not nearly as much fun.

I decided to make the twice baked version, in which about 1/3 of the mousse is spread in the pan, baked for about 15 minutes, then cooled. Then the rest of the mousse is dumped in, and the whole thing is baked for about half an hour.

Sounds easy enough, right? And perhaps it is. But apparently not for me. My first issue started with the pan. Dorie says to use the ring from an 8-inch springform (not the bottom). I remember thinking two things when I first read this part of the recipe. First, I don’t have an 8-inch springform. My spingform pan is 9 inches, which I didn’t think should be too big a problem, although the thought did occur to me to increase the amount of mousse a bit, an idea that I completely forgot about when it came time to actually make the recipe.

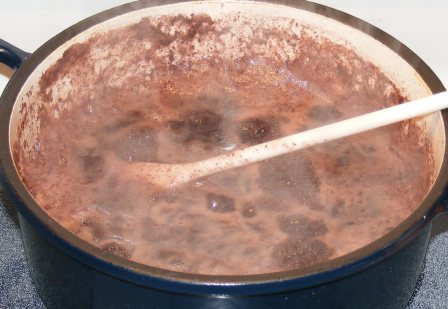
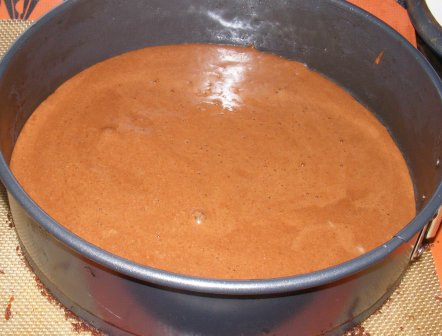
The other thing that occurred to me when I read about using the springform ring and placing it on a Silpat or parchment paper was: Won’t it leak? But if Dorie said it was OK, I would believe her. So I made the mousse, preheated the oven, buttered my ring, put it on a Silpat on a pan, loaded in the mousse, and put the whole thing in the oven. And here’s what I ended up with:

I’m too embarrassed to show you a picture of the bottom of my oven. Suffice it to say the smoke detector went off every time I opened the oven door for the rest of the day.

I cooled what was left of the crust, then topped it with the remaining mousse.

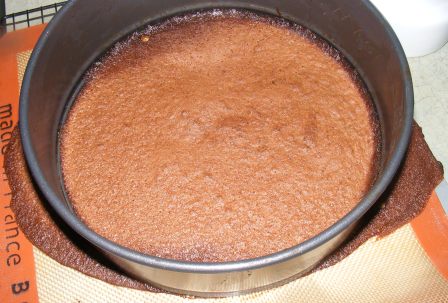
I baked the cake for about 20 minutes, at which point it seemed to be done. I figured since it was spread more thinly in the pan than the recipe envisioned, it would bake more quickly, and it did. I cooled it in the pan for a few minutes, then unmolded it. I didn’t even try to get it off the Silpat, as we were just snacking on it at home, and I’d had enough disasters for one day.

If you have Around My French Table you know that Dorie’s cake is pretty thin. But not nearly as thin as mine. The combination of the too-big pan and losing a good bit of batter from the bottom of the ring left me with a wafer-thin cake that even Mr. Creosote could have finished without exploding.

After all the trouble I had with this cake, I figured it better be pretty good. And you know what? It was. In fact, it was absolutely delicious. I was skeptical about the layers, thinking that since they were made from the same mousse, they couldn’t be all that different. But each had its own distinct flavor and texture. The cake was rich, moist, and very chocolatey. The coffee really brought out the chocolate flavor.

When I bake this cake again, I will make a few alterations to the recipe. First, I will use the entire springform pan. This business of using just the ring doesn’t make sense to me. Why not use the whole pan and remove the cake when it’s baked? And since I will be using my 9-inch springform pan again, I will double the mousse filling, which should result in a cake that’s a bit thicker than the one in the book. Which to me sounds perfect.

Simple Milk Loaf {Recipe} {BOM}

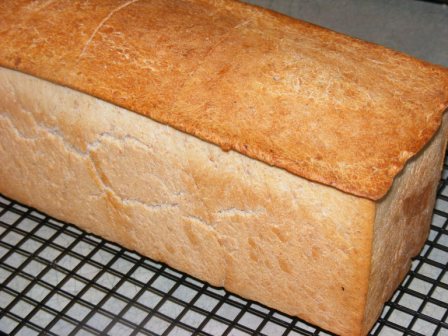
The January BOM (bread-of-the-month) for the Facebook Artisan Bread Bakers Group is a recipe that many of my baking acquaintances make on a regular basis. In fact, several of them bake this bread weekly as their everyday sandwich bread. I was excited to try this recipe and actually  made it twice — once in a regular loaf pan and a second time as a double recipe in a pain de mie pan.

Milk Loaf Proofed in Pan


Pain de Mie Milk Loaf

 This is a delicious bread that’s great for toast, sandwiches, grilled cheese, and French toast. It’s nothing fancy, but it’s perfect for a daily bread.

Simple Milk Loaf

Ingredients:

1/2 tsp instant yeast
12 oz whole milk, at room temperature, plus extra for brushing
3/4 oz golden or maple syrup, or honey
9 oz plain white (all-purpose) flour
9 oz strong white (bread) flour
1 ¼ tsp fine sea salt
1 oz unsalted butter, melted and cooled slightly
olive oil, for greasing
flour, for dusting

Method:

1. Simple mixing method: place all ingredients in bowl of mixer. Mix with dough hook until it comes together in a shaggy mass. Cover the bowl and allow dough to rest for ten minutes. Mix on low for ten seconds. Cover bowl and allow to rest for ten minutes. Continue with step 6.

2. Traditional mixing method: Place the yeast, milk and syrup into a large bowl and whisk together.

3. Add the flour and salt and mix with your hands to bring together as a soft, sticky dough.

4. Pour over the warm melted butter and mix this into the dough with your hands, then cover the bowl and leave to stand for ten minutes.

5. Grease your hands and a flat clean surface with olive oil. Remove the dough from the bowl and knead for ten seconds, then form the dough into a smooth round ball. Wipe the bowl clean and grease with olive oil, then return the dough ball to the bowl and rest for a further ten minutes.

6. Repeat this ten-second kneading and resting process every ten minutes twice, then allow the dough to rest for 30 minutes.

7. Grease a deep 5×8-inch loaf tin and dust with flour. Divide the dough into two equal pieces, shape into two balls and place side-by-side into the loaf tin. Cover with a cloth and leave to rise for one and a half hours, or until almost doubled in height. About 20 minutes before the bread has finished rising, preaheat the oven to 410°F.

8. Brush the top of the loaf with a little milk and place into the preheated oven to bake for 15 minutes, then reduce the heat to 350°F and bake for a further 25-30 minutes, or until the top of the loaf is a shiny dark brown and the loaf has come away from the sides of the tin.

9. Remove from the tin and cool on a wire rack.

Individual Coconut Cakes {Bake!}

It was Kayte‘s turn to pick our Twitterbake recipe this week, and she surprised us all by choosing something other than a lemon-based recipe. Of course, once I read the ingredients, which included grated lemon zest, I was no longer in shock. She loves coconut, too, so I guess it’s the perfect recipe for her to have chosen.

This seemed like a strange recipe to me as I read over it. For 24 mini-muffin size cakes, it only calls for 1/2 cup flour. There are four egg whites, so as first I thought it would be more like a meringue. But as I read the recipe, I saw that the egg whites are only lightly beaten, not whipped into peaks. Puzzled but curious, I started to mix up the ingredients.

In one bowl I mixed sugar, flour, and coconut. The recipe called for unsweetened coconut. I looked in the cupboard and had no less than six bags of coconut, all sweetened. I wasn’t about to buy more coconut until I used some of this up, so I used what I had and cut the sugar back a bit.

In a separate bowl I whisked the egg whites and a pinch of salt until smooth, then mixed in lemon zest and melted butter. After this was well mixed, I whisked in half of the flour mixture, then folded in the rest. I spooned the batter into mini muffin pans. I got 24 minis, each about 3/4 full. After filling the tins, I topped each cupcake with a pinch of shredded coconut.

I baked the cakes for 15 minutes at 375°F, until they were slightly puffed and the coconut was nicely toasted.

These mini cakes were delicious! I didn’t measure the lemon zest — I just zested the lemon right over the bowl — and I think I probably ended up with more than the recipe called for, as my cakes were more yellow than those pictured in the book. But I didn’t mind the extra lemon flavor at all. Combined with the coconut, the lemon gave these cupcakes a wonderful, fresh flavor. It was lighter than I expected and paired perfectly with a cup of afternoon coffee.

Our Twitterbake is a casual affair. Several of us who have Nick Malgieri‘s most recent book, Bake!, get together virtually every week or so to try a new recipe from the book. We bake. We Tweet. Sometimes we blog. Mostly we just have fun trying new recipes. 

If you have Bake! and want to join us, jump right in. We’ll even let you pick your first recipe.

Roasted Pepper & Goat Cheese Tart {ModBak}

The most recent recipe I made for the Modern Baker Challenge was a little different from some of the other recipes in the savory tarts and pies section. For one thing, this is the first recipe in this section that uses an olive oil crust, rather than the rich dough or no-roll flaky crust called for by many of the other recipes. This is also the first recipe in which the eggs are added directly to the tart without being mixed with milk or cream, making this tart more like a frittata.

I began by roasting red and yellow bell peppers in the oven. I set the oven rack on the second level, preheated the broiler, then put the whole peppers on the rack so the top sides were just an inch or two from the heating unit. I watched the peppers, and as they began to char, I turned them so that each side got well roasted. I put the peppers in a bowl, covered the bowl with plastic wrap, and set it aside until the peppers were cool enough to handle. This allowed the peppers to steam, so that the skins would peel off easily.

Once the peppers had cooled, I peeled, seeded, and stemmed them in a colander. As I worked with them, the peppers fell apart in chunks, which I put into a separate bowl. I was careful to scrape off all of the seeds, but I didn’t rinse the peppers under water, as that would have washed away much of the roast flavor. Once the peppers were cleaned and torn into chunks, I layered them in a bowl with salt, olive oil, and thinly sliced garlic.

Then I covered the bowl with plastic and put the peppers the refrigerator to marinate for about 24 hours.

The next day, I rolled out my olive oil crust, which had also been in the fridge since the previous day, and fit it into two mini-tart pans.

To fill the tarts, I simply layered goat cheese and roasted peppers in the pan, then poured in eggs that had been whipped with salt, pepper, and parsley.

I baked the tarts at 375°F for 23 minutes, until the filling was set and the crust baked through. I cooled the tarts for about 10 minutes, then removed them from the pans and finished cooling them.


As you can see from these pictures, the two tarts cames out looking quite different from each other. When I layered the tarts, I had to make some adjustments since I was using mini-tart pans. The recipe called for two layers each of goat cheese and peppers, beginning with the cheese and ending with peppers. Because the mini pans are more shallow than an 11-inch tart pan, it was difficult to fit in the four layers and still have room for the egg mixture.

For the tart on the left in the pictures above, I did three layers, beginning and ending with cheese, which meant I was able to add a decent amount of eggs. The tart on the right had four layers of goat cheese and peppers and just enough of the egg mixture to hold it together.

They were both quite tasty, although I preferred the one with more peppers. Roasted peppers and goat cheese are a classic combination, with the smokiness of the peppers pairing well with the creamy goodness of the cheese. This recipe pairs those flavors beautifully, and the result is a delicious tart that is perfect for a light lunch or an appetizer before a light supper.

If I make this recipe as mini-tarts again, I will probably do three layers, beginning and ending with peppers. That way, there would be plenty of egg mixture to bind it together, and lots of roasted pepper flavor.

Olive Oil Dough for Savory Pies & Tarts {ModBak}

One of the main reasons I started the Modern Baker Challenge was to learn how to make a successful pastry dough. For all my adventures and experience in the kitchen, both cooking and baking, I’ve never quite mastered the art of pie dough. In fact, I have pretty much given up on it and keep premade, prerolled pie crusts in the freezer.

So when I first picked up a copy of The Modern Baker, I knew that the one thing I wanted to learn from master pastry chef Nick Malgieri was how to make  a good crust. After baking from Nick’s book for about nine months, we’ve finally reached the first section featuring tarts and pies — savory tarts and pies, to be precise. And so my pastry crust adventure has begun.

In this section of the book, Nick provides three crust recipes — rich pie dough, no-roll flaky dough, and this recipe for pastry dough made with olive oil. I have made all three doughs, and this one is by far the most forgiving and the easiest to get into the pan.

As with the other pastry doughs in The Modern Baker, this dough is mixed up in the food processor. I started by measuring flour, sugar, salt, and baking powder into the bowl of the food pro and pulsing a few times to mix it all up. Then I added olive oil, egg, and a little water and processed it until it formed a shaggy ball.

I turned the dough out onto a floured board and pressed it into a disk. Then I wrapped it in plastic wrap and refrigerated it until I was ready to make a tart.

When it came time to bake, I took the dough out of the refrigerator and put it on a floured board. I pressed it out a little bit and was surprised at how pliable it was. It felt almost the same as when I put it in the fridge the day before. I rolled the dough out slightly larger than the size of my tart pan.

The dough was very soft and slightly tacky. When making butter-based pastry doughs, I fold the dough twice into a triangle shape to move it to the pan. I found that with this dough, it was easiest just to lift the dough gently into the pan without folding. The dough was pliable, and I found it quite easy to work it into the pan without stretching.

Using olive oil instead of butter makes for a less rich, more savory dough that’s perfect for savory tarts, especially those with a Mediterranean flavor. (I used this particular dough for the Roasted Pepper & Goat Cheese Tart.) The olive oil also makes this dough very easy to work with. It can be rolled at room temperature without becoming sticky or straight from the refrigerator without being too firm. And it’s nearly impossible to overwork, so you can roll it out without worrying about overdoing it.

The downside to dough made with oil is that it’s not as flaky and light as butter-based pastry dough. Although for a savory tart with lots of texture and flavor of its own, this isn’t such a bad thing.

While I wouldn’t recommend this dough for a sweet pie or tart, it is perfect for savory applications. And if you’ve long shied away from making your own pastry dough, this one would be a perfect place to start, as it’s easy, delicious, and very forgiving.

Gnocchi à la Parisienne {FFwD}

I wasn’t looking forward to this week’s French Fridays with Dorie recipe. It wasn’t one I suggested, and I certainly didn’t vote for it. In fact, I was for the first time thinking of skipping a recipe. You see, I don’t like gnocchi. As many times as I’ve tried it, I’ve always found it to be heavy and gummy, like pasta that has been overcooked to the point of sticking together in a big glob.

So, I wasn’t sure I would make this dish. In fact, I hadn’t even looked at the recipe. A few weeks ago, though, I was looking through Around My French Table when I came across the recipe for gnocchi à la parisienne. I was surprised to find out that, unlike Italian gnocchi, which is made from a potato dough, the French version is made with pâte à choux dough. This is the same basic dough used to make Dorie’s delicious Gougères. It’s also the same dough used for cream puffs.
My passion for choux dough matches — perhaps exceeds — my disdain for gnocchi, so I thought about giving this recipe a try. What finally tipped the scale was the fact that this dish also calls for béchamel, or white sauce. This is one of the mother sauces of French cooking, so I was looking forward to trying Dorie’s version.

After making the choux dough, I put a pot of water on to boil. The dough is much stickier than Italian gnocchi dough, and rather than rolling out the dough (which would be impossible) the gnocchi are formed by dropping the dough by teaspoonfuls into boiling, salted water.

After boiling the gnocchi, I let it cool while I made the béchamel.

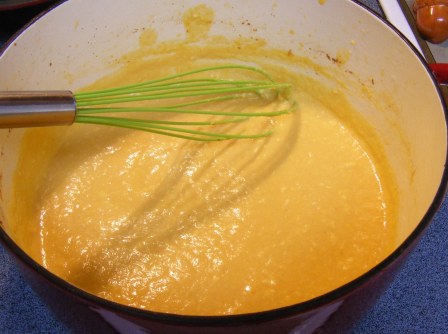
To make the béchamel, I began by heating milk in one pan while I made a butter and flour roux in another. When the flour was cooked, I combined the roux with the scalded milk, added salt, pepper, and nutmeg, then cooked it all for a few minutes. I let the béchamel cool while I grated Gruyère cheese.

I assembled the gnocchi à la parisienne by layering parmesan cheese, gnocchi, béchamel, and Gruyère cheese in a buttered baking dish. I dotted the cheese with butter, then slid the whole thing into a 350°F oven.

I baked the gnocchi for 10 minutes, then increased the oven temperature to 400° and baked it for an additional 15 minutes, until the dish was bubbly and the cheese just beginning to brown.

I was surprised by how much this dish puffed up in the oven. Choux dough tends to do that, but since it hadn’t risen much when I boiled it, I wasn’t sure what to expect when it baked. It looked good and smelled great, so I was ready to set aside my feelings about gnocchi and give this dish a try.

Dorie compares this dish to macaroni and cheese in that it is best brought to the table and eaten immediately. It reminded me of mac and cheese in flavor, too, which may be why the kids liked it so well. It wasn’t as gummy as other gnocchi that I’ve eaten. It was still heavy, but the choux dough puffed up nicely and didn’t remind me of overcooked pasta.

My wife and I liked it — and I certainly enjoyed it much more than Italian gnocchi — but it wasn’t my favorite dish that I’ve made from this book. It was worth making, both to try the French version of gnocchi and to practice making béchamel. And I might even make it again as a side dish. But unlike most of the recipes we’ve made from Dorie’s book so far, this isn’t one that will become a regular on my table.

« Older entries