The Modern Baker, by Nick Malgieri {Review}

“If you have an oven, you need The Modern Baker.”  ~ Maida Heatter

First published in 2008, Nick Malgieri‘s cookbook, The Modern Baker: Time-saving Techniques for Breads, Tarts, Pies, Cakes, and Cookies, has just been reissued in paperback.

Like most home cooks, I own a lot of cookbooks. Some I turn to all the time; others I rarely touch. The Modern Baker never leaves my kitchen.

This book contains over 150 recipes, both sweet and savory, with everything from quick breads to savory tarts to cookies, cakes, and pies. I have been baking from it for about a year and a half, and even started the Modern Baker Challenge to encourage others to bake with me. In that time, I’ve made — and blogged about — almost 100 recipes. (If you want to read any of the blog posts, use the search box on this page to search for {ModBak}, the tag I use in all my Modern Baker posts.)

I have really come to appreciate the clarity with which the recipes are written, how easy they are to follow, and the consistent results I get when making them. But what really sets this book apart from other cookbooks is the way Nick takes the mystery and intimidation out of baking. Through his helpful, step-by-step instructions and photos, he shows how to make perfect pie crusts, “instant” puff pastry, bakery-quality cakes and pies, and company-worth tarts.

I originally picked up The Modern Baker in hopes that I could finally overcome my mental block when it comes to pie crusts. As comfortable as I am in the kitchen, both with cooking and baking, I had never been able to make a decent pastry crust. It wasn’t that I didn’t try; I just could never seem to get it right. My dough would be gooey or too dry, and when I baked it, it would turn out tough or dry and crumbly. So I was delighted when I made Nick’s quick pastry crust and it turned out perfect the first time. And the second. And the third. And every time since.

The puff pastry is another breakthrough in this book. It mixes up in minutes and doesn’t require rolling in butter in “turns” as in most puff pastry recipes. After mixing the ingredients in the food processor, you pat it out, fold it over itself envelope style, roll it up, and pop it in the fridge. And the resulting puff pastry surpasses anything you can buy. Since I discovered Nick’s technique, I always have homemade puff pastry in the freezer. And the book has taught me countless ways to use it.

If you fancy yourself a cook, but have always been intimidated by baking, you need to own this book. And if you are a seasoned baker and want to find some new, streamlined techniques for the recipes you love to make, you’ll find them here. Even if you’ve never tried your hand at homemade bread or layer cakes, you will feel like a real baker after trying just a few recipes.

In fact, whatever your level of baking experience, you will learn amazing tips, techniques, and tricks from Nick Malgieri and The Modern Baker.

Crème Fraîche {Recipe}

I recently made blini with smoked salmon and crème fraîche from Dorie Greenspan’s Around My French Table. And, as always when I make a recipe calling for crème fraîche, I looked at the price of it in the store and decided to make my own. Dorie has a recipe for crème fraîche in her book, and there are lots of recipes available online. My method differs slightly from other recipes I’ve seen and is based on my experience making it numerous times.

I start with 1 cup whipping cream and 2 tablespoons buttermilk. Most recipes recommend using pasteurized, rather than ultra-pasteurized, whipping cream. But because ultra-pasteurized is the only kind I can regularly find, that’s what I use.

I heat the cream and buttermilk to about 100˚ to 110˚F. I find that heating the ingredients gives the culturing process a jump start.

Next, I cover the container with plastic wrap and leave it on the counter for 36 to 48 hours, stirring once or twice per day. 

I let the cream culture until it thickens and gets tangy. It won’t be quite as thick as sour cream, but it will continue to thicken in the refrigerator.

I put a tight-fitting lid on the container and store it in the fridge. It will keep for about 2 weeks and will continue to get tangier during that time.

For my money, homemade crème fraîche is every bit as good as store bought at less than half the price. Once you make it, you’ll find all sorts of things to do with it, like this:

Crème Fraîche

 Ingredients

  • 1 cup heavy whipping cream
  • 2 tablespoons buttermilk

Directions

  1. Heat cream and buttermilk in a small saucepan to about 110˚F.
  2. Put cream mixture in clean container, cover loosely with plastic wrap, and allow to culture at room temperature for 36 to 48 hours, stirring several times per day, until thickened and tangy.
  3. Cover container tightly and store in refrigerator.

Yields 1 cup. Best used within 2 weeks.

Blini with Smoked Salmon and Crème Fraîche {FFwD}

This dish was the French Fridays with Dorie recipe a few weeks ago. I didn’t make it then, as I thought no one else in the house would eat it. I waited a few weeks until my parents were going to be in town, as I knew at least Dad would appreciate it.

I’ve never made blini before, and I was surprised to find that they were really just little pancakes made with buckwheat flour.

While the blini were cooking, I gathered the remaining ingredients: smoked salmon, caviar, fresh tarragon (the recipe called for dill, but I used what I had), and homemade crème fraîche.

Once the blini were cooked, it was just a matter of assembling everything.

To my great surprise, the girls appeared while the blini were on the griddle and announced that they wanted to try them. A left the caviar off hers, but she and M ate three or four blini each before Dad even made it to the kitchen to try one.

This is a fun, somewhat fancy appetizer. It would be great to serve with cocktails or at the start of a dinner party. It’s impressive, but not as stuffy as you might imagine. Heck, it’s even great for kids!

Buttermilk Cottage Dill Bread {Recipe} {BOM}

Cottage dill bread has always been a favorite of mine, and I recently came up with a new recipe that adds buttermilk, replaces the dill seed found in many recipes with fresh dill, and adds whole wheat flour for flavor, texture, and nutrition. I made it last weekend and was really pleased with the results. It’s delicious fresh from the oven, and I think it would make great croutons for stuffing, too.

I began by heating buttermilk, cottage cheese, and butter.

Once the butter had melted, I mixed in onion, dill, and sugar.

I stirred the dry ingredients together in the bowl of my Kitchen Aid mixer, then added the cottage cheese mixture. This makes a very slack, sticky dough. I put the dough in a well-oiled bowl to rise.

The dough more than doubled in size in an hour.

I deflated the dough, shaped it, and put it in buttered loaf pans for a final rise.

After half an hour, the loaves were ready to bake.

A little melted butter brushed on the loaves after they came out of the oven left them soft and shiny.

I let the loaves cool for a bit, then sliced into them. The crumb was soft and fragrant, and the bread was delicious, tasting of dill and onion, and with a slight tang from the buttermilk and cottage cheese. This bread will be making frequent appearances in my house from now on.

Buttermilk Cottage Dill Bread

Ingredients

  • 1/2 cup buttermilk
  • 2 cups small curd cottage cheese
  • 5 tablespoons unsalted butter, divided, at room temperature
  • 1/3 cup finely chopped fresh dill
  • 1/4 cup minced onion
  • 2 tablespoons sugar
  • 2 teaspoons salt
  • 1/2 teaspoon baking soda
  • 2 1/2 cups all-purpose flour
  • 2 cups whole wheat flour
  • 1 tablespoon instant yeast

Directions

  1. Heat the buttermilk, cottage cheese, and 2 tablespoons butter in a medium saucepan until butter is just melted. Stir in the dill, onion, and sugar.
  2. Stir together salt, baking soda, all-purpose flour, whole wheat flour, and yeast in bowl of electric mixer. Add cottage cheese mixture and mix on low speed with paddle attachment to form soft dough, about 1 minute.
  3. Scrape down sides of bowl, then switch to dough hook and mix on medium speed for about 5 minutes. Stop mixer and scrape bowl once or twice while mixing. The dough will be very sticky.
  4. Using a flexible bench scraper, scrape the dough into a bowl greased with vegetable oil or cooking spray and turn to oil top of dough. Cover with plastic wrap and let dough rise in warm place until doubled in bulk (about 1 hour).
  5. Grease 2 loaf pans with about 1 tablespoon butter each. Deflate the dough, divide into 2 pieces, and shape loaves. Place dough in pans, cover, and let rise for 30 minutes in a warm place. Meanwhile, preheat oven to 350˚F.
  6. Bake bread for 30 to 35 minutes or until top is a deep golden brown and the loaf sounds hollow when tapped.
  7. Melt remaining tablespoon of butter. Immediately after removing loaves from oven, brush tops with melted butter.
  8. Cool loaves in pans on rack for 10 minutes. Remove from pans and cool on rack. Serve warm or at room temperature.

 Makes 2 loaves.

This recipe is the November BOM (bread-of-the-month) for the Facebook Artisan Bread Bakers group.

Spinach & Feta Turnovers {ModBak}

This week’s recipe for Modern Baker Mondays is another savory offering. And as excited as I was about making the Caramelized Onion & Gorgonzola Tart last week, I was kind of so-so about these Spinach & Feta Turnovers. I love turnovers; I could live on spinach (I’ve loved it since I was a child); and anything made with puff pasty is OK in my book.

So I wasn’t sure what exactly was holding me back. Then it occurred to me: I don’t really like feta. There, I said it. Call me a rube, call me a blasphemer. I’m just not that crazy about the stuff. I don’t hate it, and I even make things with it from time to time. But I often find it so bitingly acidic that it overpowers every other flavor and texture in the dish.

I even thought about substituting goat cheese or blue cheese in this recipe, but I decided to make it as Nick intended. I found a somewhat mild feta, and I hoped that baking it into the turnover would tone it down even more.

After rolling out the puff pastry and putting it in the fridge to chill, I began assembling the filling. I started by mixing dill, green onions, feta, and pepper in a bowl (no salt, as the feta is plenty salty on its own).

I set the feta mixture aside while I sautéed spinach in olive oil until it had wilted and cooked down considerably. It wasn’t until I was finished cooking the spinach that I read the part of the recipe that says to chop the spinach before you sauté it. No matter: I grabbed my kitchen shears and chopped it in the pan before adding it to the feta mixture and stirring in an egg.

Now it was time to assemble the turnovers. I got the dough out of the refrigerator, lined a baking sheet with Silpat, and made an egg wash with beaten egg and a pinch of salt.

I cut the edges of the dough straight, then divided the dough into six squares (I made a half batch).

To make each turnover, I brushed the edges of a square of dough with egg wash, then put a dollop of filling near one of the corners.

I folded the corner over, then sealed the edges by pressing the dough together with my fingertips.

I was surprised by how much filling I had left after making all 6 turnovers. I thought about saving it for something else, but in the end I just pitched it.

I baked the turnovers at 375˚F for 15 minutes, then turned the pan around and baked for another 10 minutes.

Feta or no, the turnovers smelled really good baking, and I could hardly wait to try them.

And I was delighted and surprised by the taste. The puff pastry was, of course, buttery and flaky. And the filling tasted of spinach and onions and only a bit cheesy, but not in a bitingly acidic way.

I had two turnovers for dinner. My 7 year old asked if she could try one, so I plated one for her and set it on the dining room table. I didn’t expect her to like it, as she isn’t a big fan of spinach, at least not by itself. But I was barely back in the kitchen when she appeared, plate in hand, asking for another one! (My kids are adventurous eaters, but even they surprise me from time to time.)

If it hadn’t been part of the puff pastry section of the Modern Baker Challenge, I doubt that I would have made this recipe. But having tasted these delicious turnovers, I’m sure I’ll be making them again.

Pissaladière {FFwD}

I almost skipped this week’s French Fridays with Dorie recipe, as I knew no one else in the house would eat it. But it sounded good to me, so I decided to make a mini version for myself.

Although this recipe comes from the Nice region of France, it’s very similar to Focaccia alla Barese, an Apulian specialty from Southern Italy. Both feature onions, anchovies, and olives baked on a yeast-risen dough. I’ll let the French and Italians fight over who first came up with this recipe. What I can tell you is that I enjoyed them both.

The recipe features caramelized onions. This must be the week for it, since I made a Caramelized Onion and Gorgonzola Tart for Modern Baker Mondays, too. Unlike the Modern Baker version, which “enhances” the onions with sugar and balsamic vinegar, the pissaladière recipe calls for caramelizing the onions the old-fashioned way — with nothing but olive oil, salt, a few herbs, and lots and lots of time.

After almost an hour over low heat, the onions were beautifully caramelized. I stirred in anchovy paste (the recipe called for anchovies, but all I had was paste; more on that later) and freshly ground black pepper. I tasted the onions and decided they didn’t need any additional salt, as the anchovy paste was plenty salty.

I set the onions aside to cool while I prepared the crust. The recipe has instructions for making a yeast-risen dough, but Dorie also notes that it can be made with puff pastry. Since I had some puff pastry in the refrigerator, I decided to use it. I rolled it out nice and thin, trying to get it into a roughly rectangular shape but not worrying too much about perfection in that regard.

I spread the dough with the onion mixture, then slid it into the oven, which I had preheated to 425˚F.

I baked the pissaladière for 20 minutes, then took it out of the oven and added black olives and sundried tomato strips (in place of the anchovies called for in the recipe). I returned the pissaladière to the oven for about 5 minutes, just to warm the new toppings.

It has been almost a year since I made Focaccia alla Barese, but the pissaladière tasted just as I remembered the focaccia tasting, which is to say, delicious. The focaccia had a much thicker crust, but otherwise the two were very similar. The sweet tang of the onions played nicely off the saltiness of the anchovies and slight bite of the olives.

This is not a dish that I will make often around here, as I’m the only anchovy eater in the house. But I could see making it as an appetizer for a dinner party, or even a light lunch for my fish-loving friends.

Ox Tongues {Bake!}

No, this isn’t a recipe for oxtail stew from the other end. Ox tongues are pastries, similar to elephant ears or palmiers, made by rolling puff pastry in sugar and baking until the sugar caramelizes.

The shape is what sets these pastries apart from their counterparts, and is also where they get their name. You begin by rolling out puff pastry dough, then cutting it into rounds. After chilling the rounds, you dredge the rounds in sugar, then roll them out in to an oblong shape, rather like an  ox’s tongue (use your imagination here, people!).

These were really good. They were almost more like a little cookie than elephant ears, which have layers of sugared pastry, but the taste was about the same.

I chose these Ox Tongues as my pick for our informal Bake! group, hosted by Kayte. I made them quite a while ago, but didn’t get around to posting them, as I somehow lost my photos. I thought I might make them again before time to post the recipe, but no such luck.

You’ll have to trust me that they were delicious and looked really good. And only slightly resembled an ox’s tongue.

Caramelized Onion and Gorgonzola Tart {ModBak}

This week’s Modern Baker Mondays recipe veers sharply away from the sweet puff pastry recipes we’ve been making recently to bring up something savory, tangy, and, OK, a little sweet. The combination of caramelized onions, blue cheese, and tarragon is genius. These flavors play off one another to bring out the best qualities in each of them.

As with all the recipes in this section, this tart is built on a crust made of puff pastry. The full recipe makes a 12 x 15-inch tart. I wanted to halve the recipe, so I used a 6 x 7 1/2-inch pan, right? Wrong!!! I used an 8 x 11 1/2-inch pan, which is very close to half the size of the jellyroll pan called for in the recipe.

How, you say? Let’s do the math. A 12 x 15-inch pan has a surface area of 180 inches (12 x 15 = 180), half of which is, of course, 90. And 8 x 11.5 = 92; pretty darn close to 90. So, I used half the puff pastry called for in the recipe, rolled it out to fit the pan, and stuck the crust in the fridge until I was ready for it.

Next, I prepared the caramelize onions. There are two basic methods for caramelizing onions — the real way, and the fake way. The real way involves cooking the onions over very low heat in butter or oil with a pinch of salt for a long time (upwards of an hour). The “fake” way, which really doesn’t involve caramelizing the onions at all, is to sauté the onions in butter or oil and add sugar and balsamic vinegar to mimic the color and flavor you get when you caramelize onions.

When I read the ingredients to this recipe and saw that it called for both brown sugar and balsamic vinegar, I figured we’d be faking the caramelized onions. But then I read the recipe and saw that the onions are cooked over low heat for 40 minutes, and I realized that Nick had combined the long, slow cooking and natural caramelization with sugar and vinegar for added flavor. I should know by now to trust him, shouldn’t I?

The onions looked and smelled wonderful while they cooked. And the flavor was as good as any caramelize onion I’d ever had.

With the crust and caramelized onions at the ready, all that was left to do was crumble some blue cheese and chop fresh tarragon. I used a mixture of chevre blue and buttermilk blue for the cheese. The goat blue was firm and very flavorful; and the buttermilk cheese was soft and tangy.

To assemble the tart, I poked the crust with the tines of a fork, spread the caramelized onions over the crust, added the blue cheese, and sprinkled on the tarragon. It seemed to be heavy on the toppings to me, but having tasted the onions, I was ready to trust Nick’s judgment on this one.

I baked the tart in a 400˚F oven for about 20 minutes, until the crust was baked through and the cheese had melted and begun to brown. I probably should have let it bake for a few more minutes, as the crust was quite soft when I cut it.

I let the tart cool for about 5 minutes, then cut into it. It was so good — the buttery crust, the tang and sweetness of the onions, the bite of the blue cheese, and the sweet, licorice-like flavor of the tarragon, all complemented one another perfectly.

Nick bills this tart as an appetizer or first course, but I was perfectly happy eating it for a late-night snack and breakfast the next morning. It would pair well with a crisp, fruity wine.

As much as I’ve enjoyed the sweet puff pastry recipes that we’ve made over the past month or so, I have to say that this is among my favorite recipes in this section so far.

Pumpkin Cornbread {Recipe} {Autumn Roundup}

When my friend Di announced that she was hosting an Autumn baking roundup, I signed on right away. This is my favorite time of year, and I love the flavors of the season. I wasn’t sure what I would make (the theme is “Handmade Loaves”), but I knew I’d find something appropriate to the Fall weather.

I actually came up with this recipe the other night when I was gearing up for the Pumpkin Dinner Roundup that I hosted last week. I had already made and blogged my recipe for that event, Stuffed Pumpkin. But I got the idea to try a cornbread featuring pumpkin, and I thought about changing my Pumpkin Roundup post if it worked out as planned. That’s when I remembered Di’s roundup and decided to submit this recipe for that event.

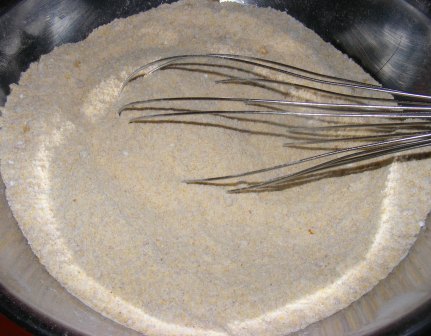
Like most cornbread recipes, this one begins by mixing the wet and dry ingredients separately, then combining them and mixing briefly before spreading in a pan.

Pumpkin Cornbread

 Ingredients 

  • 1 ½ cups unbleached all-purpose flour
  • 1 ½ cups cornmeal
  • 1 tablespoon baking powder
  • 1 teaspoon baking soda
  • ½ teaspoon Kosher salt
  • ½ cup packed light brown sugar
  • ¾ teaspoon ground cinnamon
  • ½ teaspoon freshly ground nutmeg
  • pinch ground cloves
  • 3 eggs
  • 1 ½ cups pumpkin puree
  • 6 tablespoon unsalted butter, melted and cooled slightly
  • 2 tablespoons pure maple syrup

 Directions 

  1. Preheat oven to 375˚F. Grease 8×11 ½-inch pan with spray oil.
  2. Whisk together flour, cornmeal, baking powder, baking soda, salt, brown sugar, cinnamon, nutmeg, and cloves in large bowl until well mixed.
  3. In medium bowl, whisk eggs, then add pumpkin, butter, and maple syrup and mix well.
  4. Add wet ingredients to dry ingredients and mix just until evenly moistened. Spread batter in pan and smooth top.
  5. Bake cornbread for 25-30 minutes, until firm to touch and cake tester inserted in middle comes out clean.

Yields 8-10 servings.

This was a delicious cornbread, and paired especially well with chili. I ate it warm on the day it was baked, and it had a definite pumpkin flavor. It reminded me of pumpkin bread, although not as sweet. I tried more the next morning and was surprised to find that at room temperature it tasted more like a traditional cornbread. I could hardly taste the pumpkin.

So, warm or room temperature, this is a great cornbread. And perfect for a cool Fall day.

Pumpkin Dinner Roundup

Welcome, Fall! This is, by far, my favorite season. And one my favorite things about this time of year…

Pumpkins!! Sure, they’re fun to carve, and they make great decorations. But what I really love to do with pumpkins is cook and bake with them. So, I rounded up some of my friends for a Fall-welcoming pumpkin dinner.

Renee over at Every Pot and Pan got dinner started with not one, but two recipes: Pumpkin Curry Soup and three varieties of Pumpkin Fries. She preferred the cinnamon fries, but I’d love to try the herb and spicy versions, too!

Nancy from The Dogs Eat the Crumbs rushed back from her daughter’s wedding to make another soup for us, Roasted Pumpkin Soup with Cider Cream. Mmm, mmm good!

Di over at Di’s Kitchen Notebook decided to test a new recipe on us, and we’re so glad she did. Her Pumpkin Brioche Rolls look both cute and delicious!

Marthe of The Baking Bluefinger made a delicious entrée of Pasta with Mushrooms and Pumpkin-Gorgonzola Sauce.

And nothing goes better with a big bowl of pasta than slice of fresh, warm bread. Margaret at Tea and Scones knows this, so she provided us with this beautiful, yeasty Braided Pumpkin Bread.

Mel from Mel’s Home Baking Adventure also shared two dishes with us. First, she made Pumpkin Ravioli, combining recipes from Wolfgang Puck and Giada.

And as if that wasn’t enough, she also made these amazing looking Pumpkin Scones.

Heather, over at Tease-spoon of Sugar, made this wonderful Pumpkin Risotto as an elegant, savory side dish.

My contribution was another side dish (although I could easily eat this as a complete meal): Stuffed Pumpkin.

In addition to providing the jack-o-lanterns at the top of the page, Kayte of Grandma’s Kitchen Table also gave us these wonderful Pumpkin Cookie Bites for dessert.

And last, but certainly not least, Abby at Stir it! Scrape it! Mix it! Bake it! got the whole family involved in making these amazing Pumpkin Muffins!

I’m sure these Pumpkin Muffins will go fast, but I’m hoping there are a few left for breakfast tomorrow morning!

Man, am I stuffed. I think I’ll have to wait a bit before I drink my pumpkin coffee with a slice of good, old fashioned pumpkin pie.

I hope you enjoyed this pumpkin dinner as much as I did. Be sure to check back in a few weeks for our Thanksdiving Dinner Roundup!

« Older entries