Danish Cheese Pockets {Bake!}

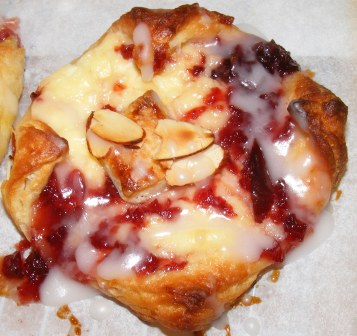
For a recent Twitterbake, my friend Margaret chose Danish Cheese Pockets from Bake!, Nick Malgieri’s recent book. The recipe calls for a half recipe of Quick Danish Pastry Dough. Rather than making a half recipe or freezing some of the dough, I decided to make two recipes — one of cheese pockets and another with cherry filling made from homemade cherry jam a friend of mine gave me.

After making the pastry dough, I  mixed up the cream cheese filling.

Isn't the sugar-coated egg yolk cool?


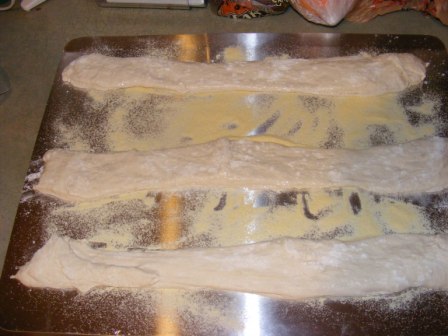
I rolled out the dough, cut it into squares, topped it with filling, and shaped the Danish.

I did the same with the cherry Danish, making some just cherry and some cheese and cherry.

After shaping the Danish, I preheated the oven. While the oven was heating, I brushed the tops of the Danish with egg wash and sprinkled them with sliced almonds.

I baked the pastries at 400°F for about 20 minutes, until they were puffed and golden.

Even though most of the Danish came apart on top, they were still delicious. The cream cheese ones were as good as any cheese Danish I’ve ever tasted.

And the cherry and cherry-cheese ones were even better.

I had planned to take most of the Danish to work, but by the time Monday rolled around, there weren’t very many left. The Danish I did take to the office disappeared with lightning speed. One person asked me for the recipe. The rest asked me to make more Danish and bring them in.

Chocolate Spice Bread {ModBak}

The second recipe in the Modern Baker Challenge is Chocolate Spice Bread.  I was so excited to try this recipe, with its promise of ultra-chocolaty goodness, that I baked it on the first official day of the Challenge.  (I made Fennel Fig & Almond Bread a few weeks ago as a “test run” of the book.) I doubled the recipe, as one loaf hardly seemed worth the effort.

This bread was not what I expected. It has Dutch cocoa, white and dark brown sugars, and lots of spices (cinnamon, nutmeg, and ginger). With all of that, I really was anticipating something akin to a dark chocolate cake. In fact, the batter looked a lot like fudge brownie batter. So I was surprised, though not at all disappointed, with the result. But more on that in a minute.

I began by mixing the dry ingredients — flour, cocoa, baking powder, salt, and the spices. An order from King Arthur had just arrived the day before, and I was excited to try my new Vietnamese cinnamon. If you have never tried it, you really should. It’s like super-concentrated cinnamon and smells so good, I just want to eat it right out of the jar.

Next, I beat the eggs, then whisked in the sugars, butter, and sour cream, and finally stirred in the dry ingredients. This was one of those rare bread recipes for which I didn’t break out the Kitchen Aid. Even doubled, it was really easy to mix by hand with just a balloon whisk.

I baked the bread at 350°F in 8 1/2 x 4 1/2-inch pans for about 40 minutes. It smelled wonderful — deep, rich, spicy. And it came out looking pretty much like the picture in the book.

I let the bread cool before cutting it. And when I did slice into it, I was surprised by the flavor. As I mentioned above, I was expecting it to taste almost like chocolate cake. But it was not nearly that sugary. It had a rich, chocolaty flavor, to be sure. But it wasn’t fudgy or overly sweet. And the depth of flavor also came as a surprise. The spices, dark brown sugar, and sour cream, along with the Dutch cocoa and other ingredients, make for a complex bread with a taste that lingered after I had finished eating it.

In the recipe, Nick Malgieri suggests that this bread is good with preserves or jam. Again, I wasn’t sure how that would be, as I expected the bread to be quite sweet on its own. But after tasting it, I could see how it might pair well with jam or jelly. I tried it with several spreads and found I really liked it with fig preserves.

All in all, I was as pleased as I was surprised by this bread, and I will definitely make it again.

Salt All Your Offerings (Except Tuscan Bread)

Season all your grain offerings with salt. Do not leave the salt of the covenant of your God out of your grain offerings; add salt to all your offerings. ~ Leviticus 2:13 (NIV)

“What makes Tuscan bread unique in the bread lexicon is that it is salt free….” So begins Peter Reinhart’s description of the 38th recipe in the Bread Baker’s Apprentice Challenge. If ever there was a way to get me excited about trying a new bread, well, this wasn’t it. 

As we have learned throughout the Challenge, the four basic components of bread are flour, water, yeast (wild or commercial), and salt. You can adjust the quantities of these components, or add other ingredients. But you don’t leave out any of the four basic ingredients. So I was fairly suspicious of this bread from the beginning. I mean, wouldn’t salt-free bread be as bland as, well, salt-free food? Ah, well, it was next on the list, so I would press on.

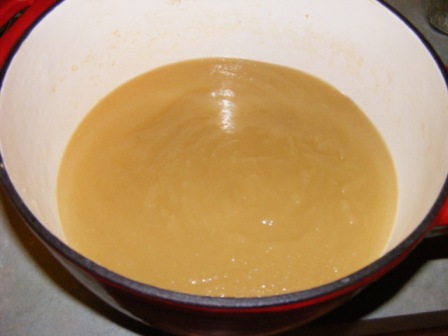
Other than not using any salt, this bread is unique in that it calls for a flour paste, which is made by mixing flour and boiling water. This mixture is allowed to sit out overnight (or up to 2 days). The mixture does not ferment, as there is no yeast added to it, but the boiling water causes the starches in the flour to gelatinize, which (theoretically) adds flavor to the finished bread.

In addition to the flour paste, the dough consists of flour, yeast, oil, and water, all of which is combined and kneaded by hand or mixed in a stand mixer.

The dough had a really nice feel to it, about the texture of French bread dough. After mixing, the dough is placed in an oiled bowl and allowed to ferment for about 2 hours.

Another function of salt in bread, besides the obvious one of taste, is that it tempers the action of the yeast. So it didn’t surprise me that this dough, sans salt, rose really fast. In fact, I had to knead it down about halfway through the fermentation stage to keep it from rising too much.

After the dough had fermented, I shaped it into two boules, which I covered with plastic wrap and set aside to proof.

Again, the dough rose like crazy, and within about 60 minutes, the loaves were ready to bake.

In another departure from prior BBA recipes, instead of adding a cup of water to a steam pan when the loaves are loaded into the oven, the oven is preheated to 500 degrees with 2 cups of water already in the steam pan. The loaves are baked for 20-30 minutes, until the internal temperature reaches 200 degrees.

The bread looked great and smelled fantastic. And when I cut into a loaf, it had a nice, tight crumb.

But, the big question was, how would it taste? Could a salt-free bread really stand up to the other amazing breads that have come out of the BBA Challenge? Would the flour paste make such a huge flavor difference that, as PR suggests, I might decide to incorporate it into other bread recipes?

In a word — meh.

The bread was every bit as bland as I feared it would be. It tasted, quite frankly, like a loaf of bread from which the salt had been omitted. I tried it plain, with salted butter, with butter and a sprinkling of sea salt, with marmalade, jam, and jelly — all to no avail. This bread was for the birds, both figuratively and literally. (On the plus side, the birds didn’t seem to mind the lack of salt.)

Oh, well, it was worth a shot. Nothing ventured, nothing gained. I guess at the end of the day, I have to agree with the poet George Herbert, who said, “Of all smells, bread; of all tastes, salt.” I’m sure he never considered eating salt-free bread.

I’m pretty sure I won’t consider it agian, either.

Weekend Warrior, BBA Style


A number of people have noted that, now that we are about halfway through the Bread Baker’s Apprentice Challenge, they have hit a wall. It’s not that they want to quit the Challenge; they just don’t want to bake for a while. Just the opposite happened to me this week. I got my baking and canning mojo on big time. I had a long weekend, and from Saturday to Monday, I managed to make and can apple cider jelly, apple butter and 4-citrus marmalade, and to bake pumpkin gingerbread, pain a l’ancienne, pain de compagne and struan.

Now, don’t get me wrong. This was not a typical weekend for me. In fact, I have never even come close to being this productive in the kitchen before. I don’t know what came over me: I just felt like baking and cooking.

On Saturday morning, I made pumpkin gingerbread, which was the October BOM (bread of the month) for the Facebook Artisan Bread Bakers group. And it was, indeed, the bomb. Check out the recipe if you want to try it for yourself.

Pumpkin Gingerbread Crumb

In the afternoon on Saturday, we went to a local farm market and came home with lots of goodies, including apple cider. I made apple cider jelly in the evening. I think it will be really good as a glaze for tarts or grilled chicken.

While the jelly was cooking, I also baked a half recipe of BBA pain a l’ancienne. This is a rustic bread, crusty, full of holes and definitely homemade looking. I especially enjoy what I consider to be real artisan breads (sourdoughs and those breads containing flour, water, salt, yeast, and little else), so I was looking forward to this recipe. It was a very slack dough, due to the high hydration.

Pain a l'Ancienne shaped

This made it somewhat challenging to work with. But the loaves came out looking really nice.

Pain a l'Ancienne

And the crumb was beautiful.

Pain a l'Ancienne Crumb

And the taste? That’s where the letdown came for me. I didn’t exactly dislike it. But I wasn’t crazy about it, either. It was sort of bland and lifeless. Ah, well. Maybe next time (which wouldn’t be a very long wait for me this weekend).

Sunday morning saw the continuation of the canning craze, as I made my first-ever batch of apple butter. Here are a few pictures: before cooking, after cooking, and after straining.

Apples for Apple Butter

Apple Butter Cooked

Apple Butter - Strained

I went kind of light on the cinnamon and nutmeg, and was really pleased with the results. Several people at work said they don’t normally like apple butter, but they liked this.

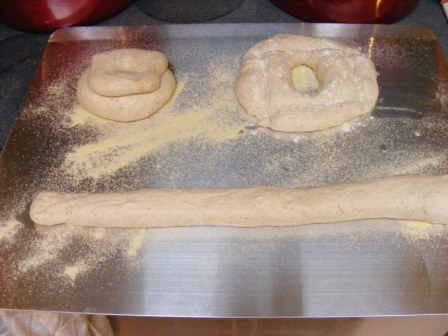
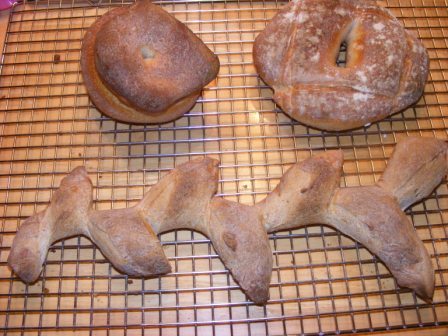
While the apples were cooking down, I started on my next BBA bread: pain de compagne. This was a fun bread to make, as it lends itself to all kinds of creative shaping. I opted to try my hand at an auvergnat (cap), couronne (crown), and epi (wheat sheaf). As you can see, I had somewhat mixed results. I liked the couronne and epi. But the auvergnat looked a bit like a stick figure head wearing a graduation cap.

Pain de Compagne shaped

Pain de Compagne proofed

Pain de Compagne

These were really flavorful loaves. My 5-year-old and I kept tearing the nubbins off the epi and eating them. And the auvergnat tasted much better than it looked.

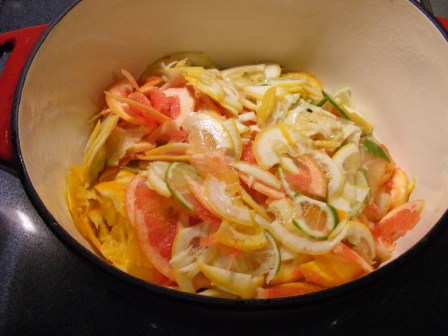
On Sunday evening, I started the 4-citrus marmalade. I began with my citrus marmalade recipe, which I altered by reducing the lemon to 1 and adding 2 limes and about 3/4 of a grapefruit. The citrus marmalade has a great flavor — tangy and sweet — and I thought the addition of lime and grapefruit would enhance the flavor and add a lot to the visual appeal as well.

4 Citruses

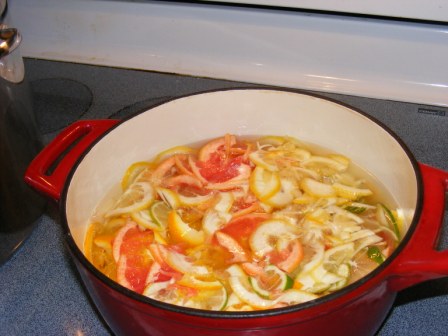
After boiling the citrus, I added the sugar, covered the pan and let it sit overnight. By Monday morning, there was a lot more liquid.

4 Citrus Marmalade in the Morning

I cooked it down for several hours, then canned it.

4 Citrus Marmalade Boiled

I will have to write up this recipe, as it was all I had hoped it would be. I can’t wait to give it away for Christmas.

For those of you keeping score, I had one more bread to go. The end of my baking adventure was struan. I used Peter Reinhart’s multigrain bread extraordinaire recipe in BBA, but I doubled it since one loaf just wasn’t enough the last time.

After I had baked my first batch of straun for the BBA Challenge, I realized I had King Arthur 12-grain flour in the freezer, which seemed like a natural addition for this bread. So this time, I replaced about 1/3 of the bread flour in the recipe with the multigrain flour.

And I added more (and different) rice. I had to go to the store to buy rice, so I picked up three bags — brown, red and forbidden (black). I cooked them all together using Nicole’s foolproof method. It is, of course, impossible to cook a few ounces of rice, and I didn’t even try. Instead, I used 1/3 cup (dry) of each rice to make a nice-sized batch. After I measured out the rice for my struan, I wrapped the remaining rice mixture in 2-ounce packages (about 8 in all) and froze them for later use.

And I will use them. I love this bread. In fact, it may be my favorite BBA Challenge bread so far. It has incredible depth of flavor. With polenta, bran, oats, rice, etc., how could it not? And it’s great plain, as toast or for sandwiches. I think the next time I make struan, I will try baking it in my pain de mie pan for a true sandwich loaf.

Thus ended my crazy canning and baking weekend. Even though I had a lot of fun making so many things, I was kind of glad when Tuesday came and I had to go back to work: after all, I needed to catch up on my rest.

Sauvignon Wine, So Little Time

After my first successful forray into jelly/jam making, I was itching to try another batch or two. I picked up a copy of Linda Amendt’s book, which has tons of great jam and jelly recipes, and decided to try some “drunken” spreads: Cabernet Sauvignon Wine Jelly and Blackberry Cabernet Sauvignon Jam (recipe to follow). 

After reading the author’s admonitions about not doubling or otherwise changing the amounts in the recipes, I figured I’d make a half batch of the cab jelly. That way I could make the jam and jelly with one 750-ml bottle of Cabernet with just a little wine left over. But what to do with the rest…?

An open bottle is an empty bottle

An open bottle is an empty bottle

 I had planned on preparing both recipes on the same day, but I ended up making the cab jelly a day or so before I got around to the blackberry cab jam. The jam recipe called for the following ingredients:

  • 3 3/4 cups (about 1 1/2 lbs) crushed blackberries — I used frozen
  • 1 pkg powdered fruit pectin
  • 6 1/3 cups (yikes!) sugar
  • 1 cup Cabernet Sauvignon wine
  • 1/2 tsp. unsalted butter (optional)

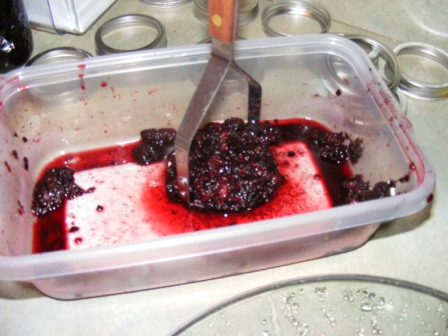
I crushed the thawed blackberries one layer at a time in a flat container.

Mashing Berries

Then I put the berries, juice and all, into a pot with the pectin, which I had mixed with 1/4 cup sugar, and the butter. The butter is optional, but I like to use it, as it helps keep the jam from foaming as it cooks.

Blackberries

I brought this mixture to a full rolling boil, stirring constantly. Then I gradually stirred in the remaining sugar, brought the mixture back to a rolling boil, and stirred and boiled it for 1 minute. I then took it off the heat, stirred in the wine, and let it rest for 5 minutes, stirring occasionally, while I got the jars and lids ready.

Cooked Jam

I filled the jars to within 1/4 inch of the top, wiped the rims and threads, placed the lids on the jars, and screwed on the bands. The recipe said it would make 7 or 8 eight-ounce jars; I ended up with 7 eight-ounce and 4 four-ounce jars. I put the jars in the water bath, brought it to a gentle, steady boil, and processed the jars for 10 minutes.

Processing Jam

I took the jars out of the water bath, put them on a dish towel on the counter, and waited for the thocking sound of the lids sealing. All of the lids sealed, and I kept checking the jam throughout the rest of the evening to see if the jam was setting up. It stayed liquidy until bedtime, but by morning it was set and beautiful.

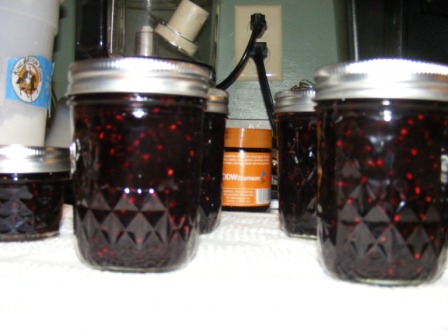
Blackberry Cabernet Jam

I had a little bit of jam left over when I filled the jars, which I put in a custard cup in the fridge. I ate it on toast for breakfast. And a peanut butter sandwich for lunch. Then more toast. And another sandwich. It is absolutely delicious. The berries are so fresh and bold tasting, and the wine gives it an added bit of richness.

When I was ladeling the jam into the jars and realized how much I was going to end up with, I started wondering what I would do with all of it. Now I’m wondering how soon I will have to make more.

In a Jam, or Is It Jelly?

Last weekend, my friend Kevin and I went to a mutual friend’s house to pick grapes. She is out of town and said we could come harvest the grapes when they were ripe. We were planning to bring the grapes back to my house to make and can jelly. Although I have made freezer jelly, this was to be my first time canning. I went to the store the day before we were going to pick the grapes and bought canning jars, lids and pectin.

It may surprise you that someone who cooks as much as I do has never canned before. It surprises me, too. I’ll have to talk to my mom about that the next time I see her. Yet another deficieny in my culinary education (I had to teach myself to make injera bread, too, if you can believe it).

After buying the supplies, I went home and read the inserts in the pectin containers, the Better Homes and Gardens Cookbook section on canning, and of  course a bunch of (often conflicting) information about canning online. Armed with that knowledge (and the knowledge that Kevin would be here and had experience in these matters), I was ready to make grape jelly.

Or so I thought. We got to our friend’s house only to discover that, while we were ready for the grapes, they weren’t ready for us.
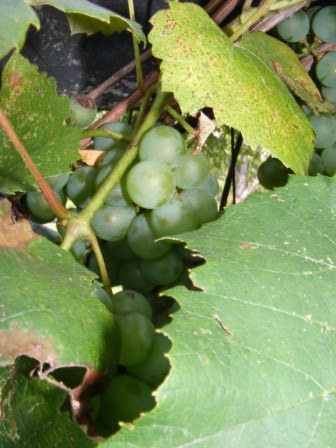
Grapes

They were close to being ripe, but not quite there yet. Maybe in a week or so. Our friend is out of town for a few months, so we decided to see what else she had growing in her garden. We picked a bunch of jalapeno and Anaheim peppers and decided to make hot pepper jelly that afternoon. One thing led to another, including lunch with Kevin, my wife and daughters at Outback Steakhouse, and we never got as far as making the jelly before Kevin had to leave.

Undaunted, but with more than a little trepidation, I decided to make and can the jelly myself. I knew that the jelly would be fairly easy; it was the canning that had me worried. But armed with my recently-acquired knowledge, I decided to have a go at it anyway.

In addition to the peppers we had harvested that day, I had a number of peppers that I had received in my CSA boxes the past few weeks. So I decided to make one batch of jalapeno jelly and, if it wasn’t a total disaster, a batch of mixed pepper jelly.

My canning jars and lids had already been washed in the dishwasher. I put the jars on their sides in my makeshift canner (a large stockpot with a round rack set in the bottom), added enough hot water to cover the jars, then covered the pot and put it on the stove over medium-high heat. I put the lids in a small saucepan of water and brought it to a simmer. I let both of these continue to simmer while I made the jelly.

I stemmed and seeded about 12 jalapenos, then whirred them in the food processor with a cup of cider vinegar to a nice mush, which I put into a saucepan with another cup of vinegar and 6 cups of sugar. I boiled the mixture for 10 minutes (note for future reference: don’t inhale the steam from 12 jalapenos), then added liquid pectin and boiled another minute.

Showtime. Time to fill the jars and process them in the hot water bath. Once I worked out a system of where to put the jars, how to fill them, etc., it really was a rather simple process. I ended up with 5 pints of jelly, which I processed in the hot water bath for 10 minutes. Then I turned off the heat, removed the lid, and let them rest in the water an additional 5 minutes.

Processing Pepper Jelly

Within a minute or so of taking the jars out of the water, I started to hear these popping, plonking noises, which I was sure meant I had done something terribly wrong and ruined the whole thing. As it turns out, it was just the lids sealing themselves. The jelly was thick, but still a bit goopy-looking, but I figured (hoped) it would firm up as it cooled.

Interstingly, making the jelly was by far the hardest part of the whole operation. Flush with that success, how could I but try again? For my next trick, I would make 6-pepper jelly, featuring about 1/4 jalepenos and the rest a mix of green and yellow bell peppers, Anaheims, poblanos, and another pepper I got in my CSA but wasn’t sure what it was.

This time, I decided to chop the peppers up in the food pro but stop short of pureeing them, as I wanted chunks of peppers visible in the jam.

Grinding Peppers

Pepper Puree for Jelly

I put the not-quite-puree into the pot, added a cup of cider vinegar, and an envelope of powdered pectin. Then I went to measure out the sugar, and found out I had a problem. The recipe I was sort of following called for 5 cups of sugar, but I only had 3 1/2 cups. Ah, no matter. I remembered Kevin saying that he automatically cut the sugar in most jam and jelly recipes by half, so I didn’t worry. Turns out maybe I should have.

I cooked the jelly, then filled and processed the jars. The jelly was beautiful.

Six Pepper Jelly

Eleven Pints o' Jelly

The jalapeno jelly had already started to set up. And I was so pleased with the look of the second batch, I didn’t notice that the pepper pieces were floating to the top of the jar. As the 6-pepper jelly cooled, I kept checking it, but it never set. It was about the consistency of runny syrup.

Back to the ‘net to try to diagnose my problem. It didn’t take long to figure out that cutting back on the sugar was the most likely culprit. It seems that sugar has almost as much to do with making the jam set as the pectin. As I was out of sugar (hence the problem in the first place), and it was too late to go out and get more, I let the jam sit for the night. There was always the hope that it might have set by morning.

Morning came, like it does, but the jam was as soupy as it had been the night before. So, off to the store for sugar and home to attempt a rescue. I made a pectin syrup by boiling a packet of gelatin in 3/4 cup of water. I added 1 tablespoon of this syrup for each pint of jam, along with the remaining sugar, then boiled this mixture for a minute or so. I put the jam into clean jars and reprocessed it in the hot water bath.

It still took a while for the jam to set up, but it did, as you can see by the fact that the peppers are evenly spread throughout the jam in this picture.

6-Pepper Jelly

The jars all sealed, and both batches look and taste wonderful. With 2 successes, and 1 small setback, I feel ready to tackle more canning. 

Come on grapes!!