Backyard Mint Ice Cream {Ice Cream Sunday}

For my second Ice Cream Sunday post, I decided to make Backyard Mint Ice Cream. This recipe is Jeni’s basic recipe with “a large handful” of hand-torn mint added just before the base is chilled.

If you aren’t familiar with the base recipe, check out my Sweet Corn & Black Raspberry Ice Cream post and leave out the corn and blackberry sauce. You can also find the Backyard Mint recipe here.

Phyl’s notes:

  • The recipe says to add the torn mint to the ice cream base, chill for 4 to 12 hours, then strain out the mint. Several of the Jeni ice cream bases I’ve made have been quite thick, almost the consistency of set pudding, and I was afraid I might have trouble getting the base through the strainer. To avoid this issue, I tied the mint in a double layer of cheesecloth, as I figured this would impart the mint flavor without having to strain it. What I didn’t count on was how much of the base the cheesecloth would absorb. I ended up with about a pint of ice cream, rather than the quart it should have made.
  • I skipped the ice bath, as the base had to chill with the mint in it anyway.
  • This ice cream would be great with mini chocolate chips or small chocolate pieces added at the end of churning.

We really enjoyed this ice cream, and all wished we had more. Luckily, this is a really easy recipe to make. And I have plenty of mint in the backyard.

Sweet Corn & Black Raspberry Ice Cream {Ice Cream Sunday} {Recipe}

I recently bought myself two presents: Jeni’s Splendid Ice Creams at Home by Jeni Britton Bauer and The Perfect Scoop by David Lebovitz. And since I knew I would be trying lots of ice cream recipes, I decided to declare the beginning of the week “Ice Cream Sunday”. I probably won’t post every week, and I’m sure I won’t write about all the recipes I try. But I do want a place to record my adventures so I can keep track of what I liked, what I didn’t, and what I might do differently next time.

It all started when I decided to host Ice Cream Week earlier this Summer. A full week of ice cream recipes — how bad could that be? I had picked my recipes, made all five of them, and written the blog posts., Then I discovered this recipe.

Sweet Corn Blackberry Ice Cream
Picture from saveur.com

A lot of my friends had made Jeni’s recipes, and they all raved about how good they were. So even though my Ice Cream Week recipes were in the bag, I decided to try a Jeni recipe. Saveur had a bunch of them on its website, and I pinned several to my Ice Cream board. Although they all looked good, I quickly settled on this recipe. Not only do I love black raspberries, the idea of making ice cream with sweet corn was just too strange and intriguing to pass up.

I generally don’t post recipes when I’m making them from a published cookbook, but this one is readily available online, so I’ll share it here.

Sweet Corn & Black Raspberry Ice Cream (from Jeni’s Splendid Ice Creams at Home)

Ingredients

  • 1 cup black raspberries or blackberries
  • 1/2 cup granulated sugar (for black raspberry sauce)
  • 2 cups whole milk
  • 1 tablespoon plus 1 teaspoon cornstarch
  • 3 tablespoons (1 1/2 oz.) cream cheese, softened
  • 1/4 teaspoon fine sea salt
  • 1 ear sweet corn, husked
  • 1 1/4 cups heavy cream
  • 2/3 cup granulated sugar (for ice cream)
  • 2 tablespoons light corn syrup

Directions

  1. To make raspberry sauce, bring black raspberries and 1/2 cup sugar to a boil in a 1-quart saucepan over medium-high heat. Continue to boil, stirring occasionally, until thick, about 8 minutes; strain and chill.
  2. To make ice cream, in a small prep bowl, stir together 2 tablespoons of the milk and the cornstarch to make a slurry. Set aside.
  3. In a medium bowl, whisk cream cheese and salt until smooth. Set aside.
  4. Cut kernels off cob of corn and cut cob into large chunks; reserve kernels and cob together. In a 4-quart saucepan, whisk together remaining milk and the cream, sugar, and corn syrup; add corn kernels and cob and bring to a boil over medium-high heat. Cook and stir for 4 minutes. Remove from heat and whisk in slurry. Return to a boil over medium heat and cook, stirring with a heatproof spatula, until thickened, about 2 minutes. Pour mixture through a fine strainer into a bowl and discard corn solids.
  5. Gradually whisk hot cream mixture into cream cheese until smooth.
  6. Cover bowl and refrigerate mixture until well chilled, preferably overnight. Or to quick chill, pour mixture into a gallon-size zipper seal bag and submerge in ice water for about 30 minutes.
  7. Churn base in ice cream freezer according to manufacturer’s instructions.
  8. Layer ice cream and black raspberry sauce in storage container. Press a piece of parchment or wax paper against surface of ice cream and freeze until firm, at least 4 hours.

Makes 1 quart

This ice cream is insanely good. The sweet corn gives it a silky texture and an almost vanilla-like flavor. And the blackberry sauce adds visual appeal and a nice sweet-tart finish.

I can’t wait to try more of Jeni’s ice creams. And I haven’t even cracked open David’s book yet.

Stay tuned.

Guinness Stout Ice Cream {Recipe} {Ice Cream Week}

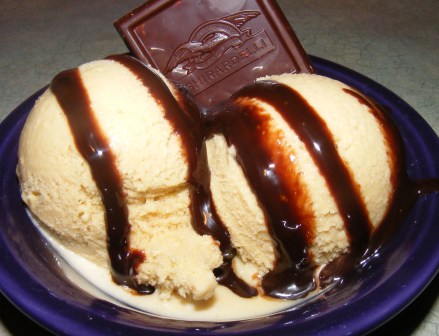
It’s the last day of Ice Cream Week, and what better way to finish than with a deliciously decadent stout ice cream? The malty, slightly bitter flavor of the Guinness pairs well with the sweet, rich custard. This ice cream is especially good with chocolate syrup.

This recipe is based on one from Saveur.com.

Guinness Stout Ice Cream

Ingredients

  • 3/4 cup granulated sugar
  • 1/2 teaspoon Kosher salt
  • 6 large egg yolks
  • 1 1/2 cups heavy cream
  • 1/2 cup half-and-half
  • 1 bottle Guinness stout, chilled
  • 1 teaspoon vanilla extract
  • chocolate syrup (optional)

Directions

  1. Whisk sugar, salt, and egg yolks in heavy saucepan until thick and lemon colored.
  2. Stir in cream and half-and-half. Heat mixture over medium-high heat, stirring constantly, until it thickens, about 6-8 minutes.
  3. Pour mixture through a fine-mesh strainer into a bowl. Stir in Guinness and vanilla.
  4. Cover and refrigerate ice cream base for at least 4 hours or overnight, then process in ice cream maker per manufacturer’s instructions. If desired, add chocolate syrup near the end of the churning cycle to create a chocolate swirl.
  5. Freeze for several hours before serving. The alcohol in the stout will keep the ice cream from freezing as solid as other custards.

Makes about 1 quart

It should be no surprise to anyone who knows me that I would make Guinness ice cream. Any more than it shocked me to read that Margaret had figured out how to make Tea and Biscuit Ice Cream. Or that Rebecca found a way to work baklava into ice cream. And Di made Chocolate Cookie Dough Ice Cream. Can you tell she has kids?

I hope you’ve enjoyed Ice Cream Week as much as I have. Let me know if you try any of the recipes and what you think. And I’d love to hear about your favorite ice cream recipes, too!

Molasses Almond Praline Ice Cream {Ice Cream Week}

It’s day 4 of Ice Cream Week, and today’s theme is Nuts for Ice Cream. I knew I wanted to make either butter pecan or praline ice cream for today, and when I started looking at recipes I found this one for Blackstrap Praline Ice Cream on my Pinterest board, so I figured it was a good time to try it.

The original recipe is from Jeni’s Splendid Ice Creams and was published in Saveur magazine and on their website. Jeni has an interesting method for making ice cream in which she boils out some of the water from the milk and cream and uses cornstarch and cream cheese to bind the ingredients and increase the fat content. Several of my friends swear by her recipes, so I was excited to try this one to see how it came out.

I made a few changes to the recipe, based on what was in my cupboard the day I made it. I didn’t have blackstrap molasses, so I used Brer Rabbit Mild Molasses. My ice cream was much lighter in color than the picture on Saveur, but the molasses flavor still really came through. And I used almonds for the praline (a sin, I know) because that’s what I had on hand.

The base had a pudding-like consistency. In fact, after refrigerating it overnight, that’s exactly what it looked like. It churned up beautifully. My wife and I tried it as soon as it was done churning, and it was amazing. Rich, smooth, velvety, and the praline was outstanding, with its nutty, caramel-like flavor.

But what really blew my socks off, and finally made me realize what all the fuss over Jeni’s recipes was about, was when I tried it the next day. After freezing, a lot of homemade ice cream is too solid and looses that creamy consistency.

But this ice cream was as smooth and creamy as any double-churned gourmet ice cream I’ve ever tasted. And the overnight rest in the freezer actually improved the flavor, too.

OK, so I’m sold on Jeni’s ice cream. I won’t go so far as to say I’ll never make any other kind (I still like egg-based custard ice creams), but I will definitely try more of her recipes. And we might just venture to Chagrin Falls to try some at one of her stores.

Margaret forgave me for using almonds in praline. Hopefully, her Greek friends will give her a pass, too, for making Baklava Ice Cream! And no forgiveness is needed for Rebecce, who made Nutella Gelato.

Ice Cream Week caps off tomorrow with an original recipe, Guinness Stout Ice Cream.

Frozen Wine Slushy {Recipe} {Ice Cream Week}

It’s day 3 of Ice Cream Week, and today’s theme is Sorbet (or Other Non-dairy Frozen Treats). I’m opting for “Other” with this frozen wine slushy treat.

This wine slush can be enjoyed two ways: as an eat-with-a-spoon slushy or a wine punch.

Frozen Wine Slushy

Wine Slush with Sparkling Limeade

Either way, it’s a refreshing summery treat.

Frozen Wine Slushy

Ingredients

  • 1 750-ml bottle Sauvignon Blanc
  • 1 12-ounce can frozen lemonade
  • 2 cups cranberry juice
  • Sparkling limeade or lemon-lime soda (for punch variation)

Directions

  1. Stir together wine, lemonade, and cranberry juice. Freeze for 3 to 4 hours, until fairly solid. The wine will keep the mixture from freezing firm.
  2. For frozen wine slush, scoop frozen mixture into glasses and serve with a spoon.
  3. For slushy wine punch, fill glass about 3/4 full with frozen slush, then top with sparkling limeade or lemon-lime soda. Serve as is or with a straw.

I will be serving this at our next summer dinner party. It’s easy, refreshing, and delicious.

Margaret is 3 for 3 in Ice Cream Week so far, turning in this wonderful looking Pina Colada Sorbet for today’s entry. Di made a beautiful Raspberry Sorbet. My wife would love Rebecca’s Mango Ice. And Abby made Homemade Waffle Cones to serve it all!

Coming up tomorrow: we’re going “Nuts for Ice Cream” with Molasses Almond Praline Ice Cream.

Basil Honey Frozen Yogurt {Recipe} {Ice Cream Week}

It’s day two of Ice Cream Week, and today I’m featuring an original recipe for frozen yogurt. About this time of year, I’m always trying to come up with ideas to use fresh basil. With the hot weather we’ve been having, my basil plants are growing like gangbusters, and I like to use it in different ways (one can only eat and freeze so much pesto).

So I decided to try adding it to frozen yogurt. I used a combination of sweet and cinnamon basil, but you can use whatever kind you have. I might try it with a bit of Thai basil next time.

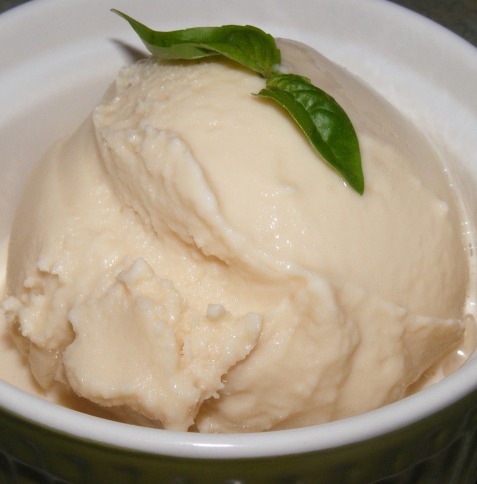
The flavors of honey and basil complement each other beautifully. This is sure to be a frequent repeat around here.

Basil Honey Frozen Yogurt

Ingredients

  • About 2 cups fresh basil leaves
  • 1/2 cup honey
  • 1/2 cup granulated sugar
  • 3 cups plain Greek yogurt
  • 1 teaspoon vanilla extract
  • 1 tablespoon lemon juice

Directions

  1. Wash the basil leaves, then blot dry with a kitchen towel or paper towels.
  2. Chop basil leaves (a rough chop is fine) and place in small saucepan with honey and granulated sugar. Heat until sugar melts and the mixture just begins to boil, then remove from heat, cover, and let steep for 20 minutes.
  3. Mix yogurt, vanilla, and lemon juice in medium bowl. Strain honey mixture through fine mesh strainer into bowl with yogurt. Mix well.
  4. Chill yogurt mixture for several hours or overnight, then churn in ice cream maker according to manufacturer’s instructions. Eat soft or freeze for a few hours to harden.

Makes about 1 quart

On tap for tomorrow: Frozen Wine Slushy

And be sure to check out:

Citrus Beet Ice Cream {Recipe} {Ice Cream Week}

It’s Ice Cream Week here at Of Cabbages and King Cakes! Five days devoted to everyone’s favorite summer treat. Today’s theme is “Fruits of the Summer”, which I have loosely interpreted to include one of my favorite farmer’s market finds: red beets.

This is a really easy recipe to put together. Roasting the beets is the most time-consuming part, and it’s mostly hands off. After trimming and cleaning the beets, you wrap them in foil and roast them until tender.

The most striking thing about this recipe is the color: it’s this amazing, not-at-all-natural-looking fuchsia.

And as for the ice cream itself…

It was surprisingly good, especially with a little chocolate syrup. The beet flavor really came through and, combined with the citrus, made this ice cream both bright and earthy.

Citrus Beet Ice Cream

Ingredients

  • 4 medium red beets
  • 1 medium orange
  • 1/4 cup orange juice
  • 1 cup sour cream
  • 3/4 cup granulated sugar
  • 1/2 cup half-and-half

Directions

  1. Preheat oven to 375°F. Trim stems and roots from beets. Wash beets and pat dry with paper towel. Wrap beets in heavy duty aluminum foil and roast directly on center rack in oven for 1 hour and 20 minutes. Carefully remove foil package from oven. Squeeze beets. They should give a bit but still be somewhat firm. If necessary, return beets to oven and roast until done.
  2. Unwrap beets and allow to cool until cool enough to handle. Rub beets to remove skins, then dice beets and place in food processor.
  3. Zest the orange and add to food processor. Juice orange and add this, along with 1/4 cup additional orange juice, to food processor. Process mixture until smooth.
  4. Add sour cream, sugar, and half-and-half and process until smooth and completely combined.
  5. Press base through a fine mesh sieve into medium bowl. Cover bowl and refrigerate until well chilled, preferably overnight.
  6. Process base in ice cream maker according to manufacturer’s instructions.
  7. Serve with drizzle of chocolate syrup.

Makes about 1 quart

I know it sounds like an odd combination, but it’s worth making, if only for the color.

Here’s what’s on tap for the rest of the week (links will go live on the scheduled day):

And be sure to check out the other posts for today’s theme:

Fresh Strawberry Frozen Yogurt {Recipe}

Sometimes the simple things in life are the best. Like a simple, delicious strawberry frozen yogurt.

Or a simple post with a simple recipe for strawberry frozen yogurt.

This recipe was inspired by David Lebovitz and adapted by me.

Fresh Strawberry Frozen Yogurt

Ingredients

  • 1 pint peak of the season strawberries, stems removed and rinsed
  • 2/3 cup granulated sugar
  • 2 teaspoons Kirsch
  • 1 cup plain yogurt (whole fat, if you can find it; can also use Greek yogurt)
  • 1/3 cup sour cream
  • juice of 1/2 lemon

Directions

  1. Cut the strawberries into 1/2-inch slices and place in a bowl with sugar and Kirsch. Stir to mix well, then set aside to macerate for 1 to 2 hours.
  2. Put strawberries and their liquid, yogurt, sour cream, and lemon juice in bowl of food processor. Process until mixture is smooth. Press mixture through fine mesh sieve to remove seeds.
  3. Refrigerate mixture for 1 hour, then process in ice cream maker per manufacturer’s instructions.
  4. Enjoy immediately, or freeze to desired consistency.

Makes about 1 quart.

My family loved this frozen yogurt. In fact, my wife pronounced it “too good”, meaning it won’t last long around here. It was sweet, slightly tart (my 8-year-old picked up on the lemon juice), and tasted like fresh strawberries.

Everyone was surprised when I told them it had sour cream in it. I added it because the only yogurt I had was low-fat, but I ended up liking the smoothness and tang it lent to the frozen yogurt. From now on, it will be a regular addition to my homemade frozen yogurt.

This post is part of Strawberry Week here at Of Cabbages and King Cakes. Check out my other posts to find out what else I did with fresh strawberries while they were in season this year.

Pineapple Tarte Tatin {ModBak}

I knew this week’s recipe for the Puff Pastry section of the Modern Baker Challenge was going to give me trouble. Like my well-known issues with pie crusts, I’ve always struggled with caramel. It goes from amber to burnt so quickly, and I usually end up having to make it twice. Nonetheless, I bought my pineapple, assembled my ingredients, and got to work.

I began by roasting the pineapple until it was cooked and slightly dried.

While the pineapple cooled, I made the caramel sauce. This recipe is unique in that the tatin is baked in the same pan that you use for the caramel sauce. One of the problems with this is that the caramel continues to cook after you remove it from the heat, so you have to be careful not to overcook it.

I, of course, overcooked it. It very quickly went from this…

…to this…

…to this.

In my own defense, I don’t think the caramel was actually overcooked when I took it off the heat. But it, of course, kept cooking after I removed it from the heat. I turned my attention to the pineapple, and by the time I got back to the pan, the caramel looked a bit overdone.

The caramel contained sugar, corn syrup, water, and butter and only took about 10 minutes to make; so I should have made it again as soon as I suspected it was burnt. But, of course, I didn’t. I layered on the pineapple, covered the top with puff pastry dough, and baked it.

Another issue created by the hot pan was that the puff pastry dough started to melt when I laid it over the top of the tatin. This didn’t seem to negatively impact the baked tart too much.

I let the tatin cool in the pan for a few minutes, then turned it out onto a plate.

It smelled delicious with the caramel and pineapple, and I was hopeful that the caramel hadn’t overcooked to the point of bitterness.

After the tarte had cooled, I cut a slice and plated it with some homemade vanilla ice cream.

One bite was all it took. The pineapple was sweet and well-caramelized. But the caramel was overcooked and inedible. I ate the ice cream (no sense wasting that), then threw out the slice and the rest of the tatin.

Fortunately, it wasn’t a particularly difficult or time-consuming recipe, nor did it call for a lot of ingredients. But it was still a huge disappointment. Don’t get me wrong: there was nothing wrong with the recipe as written. All of my problems were operator error. 

Unfortunately, they were enough to ruin the entire tatin. And it made me that much more anxious about the next recipe: apple tarte tatin. It’s the same basic recipe made with raw apples instead of roasted pineapple. You’ll have to come back in a few days to see how that turned out.

Deep-dish Peach Pie with Woven Lattice Crust {ModBak}

If you can’t find perfectly ripe peaches, make the apple or plum variation.” So says Nick Malgieri in the introduction to this recipe. Reading the ingredients, you quickly understand why. Other than the peaches, the filling contains nothing but sugar, a few tablespoons of flour, and some nutmeg. The peaches are clearly the star of the show.

So, with all of that, you’d think I’d heed Nick’s warning, wouldn’t you? Anyone who has made as many of Nick’s recipes as I have and trusts that he knows what he’s talking about wouldn’t try this recipe without perfect peaches.

Except me. But more on that in a minute. This recipe is very simple to put together. After rolling out and shaping the puff pastry, you prepare the peaches, mix them with a little sugar and spice, then put the whole thing together and bake it.

I started by making the woven lattice crust. This part might seem a bit intimidating if you’ve never made a lattice topping before, but Nick’s instructions make it simple.

I began by drawing an outline of my pan on parchment paper, then rolling puff pastry into a rectangle slightly larger than the outline.

Next, I cut the puff pastry into strips,…

… and removed every other strip.

Then I folded the first, third, and fifth strips back to the center, laid a strip of dough crosswise over the remaining dough, folded the strips back down, and repeated with the second and fourth strips.

I turned the parchment around and did the same thing from the other end, and I had my lattice top.

I slid the lattice into the fridge while I prepared the filling.

To prepare the peaches, I put a pot of water on to boil and filled a bowl with ice water. After cutting a small “X” in the base of each peach, I plunged them into the boiling water for a few seconds, then moved them to the ice bath.

When I began to peel the peaches, it quickly became obvious that they were underripe. The skins, which should have slipped off, clung stubbornly to the peaches. When I switched from a paring knife to a peeler, it was apparent that the flesh, which should have squished under the pressure of the peeler, was firm and underripe. 

Heeding Nick’s warning, I should have stopped right then and either switched to apples or plums, or returned to the store to buy different, riper peaches. At the very least (as I realized later), I should have returned the peaches to the boiling water to loosen the skins and soften the peaches somewhat.

Of course, I didn’t do any of those thing, but rather, proceeded stubbornly with the pie. Once all the peaches had been peeled and sliced, I mixed them with the sugar, flour, and nutmeg.

I scraped the mixture into the pan, then topped it with chunks of cold, unsalted butter.

I took the lattice crust out of the refrigerator, brushed it with egg wash, sprinkled it with finishing sugar, and slid it onto the pie.

I baked the pie in a 375° oven for about 35 minutes, until the crust was golden and the filling was nice and bubbly.

I served the pie with homemade crème anglaise ice cream, which I hoped would make up a bit for the lackluster peaches.

Now, you’re probably expecting to read that this pie was tough and entirely lacking in flavor. To my surprise, however, it was actually delicious. Yes, the peaches were a bit on the firm side (although they did soften up considerably in the oven). And the flavor wasn’t as bright and “peachy” as it might have been with ripe peaches. But it was still really good.

I made this recipe as part of the Modern Baker Challenge. And it’s one I’ll definitely make again. But next time, with perfectly ripe peaches.

« Older entries